• Shopping Cart Shopping Cart
    0Shopping Cart
SvenStudios
  • ABOUT US
    • WHO ARE WE?
    • TESTIMONIALS
  • WEDDING PACKAGES
    • ADELAIDE PACKAGES
    • AUSTRALIA-WIDE PACKAGES
    • NZ-WIDE PACKAGES
  • SERVICES
    • WEDDING PHOTOGRAPHY
      • ADELAIDE WEDDINGS
      • DARWIN WEDDINGS
      • CANBERRA WEDDINGS
      • HOBART WEDDINGS
      • PERTH WEDDINGS
      • QUEENSTOWN, NZ WEDDINGS
      • WORLDWIDE
    • WEDDING VIDEOGRAPHY
    • FAMILY PHOTOGRAPHY
    • NEWBORN PHOTOGRAPHY
    • COUPLES & ENGAGEMENTS
    • PHOTOBOOTH HIRE
    • HAPPLEE QR
    • SELFBOOTH
    • SEATSCAN
    • AUDIO GUEST BOOK HIRE
    • LIVE STREAM
  • PORTFOLIO
    • WEDDING PHOTOGRAPHY
      • SORT BY WEDDING VENUE
    • COUPLES PHOTOGRAPHY
    • FAMILY PHOTOGRAPHY
    • NEWBORN PHOTOGRAPHY
  • BLOG
  • SHOP
    • BOUQUET CHARMS
    • HAND MADE ITEMS
    • GIFT CARDS
    • DIGITISATION SERVICES
      • SUPER8 TO DIGITAL
      • VHS TO DIGITAL
    • PAY AN INVOICE
  • CONTACT
  • Menu Menu
Interesting

Engagement Rings Under $2,000: 7 Designs That Don’t Look Cheap

The average Australian engagement ring now sits somewhere around AUD $7,000 to $10,000, which means a $2,000 budget can feel like a compromise. It doesn’t have to be. The reason most sub-$2,000 rings look cheap isn’t the price — it’s the design choices made to hit that price. A poorly cut natural diamond shrunk down to 0.3 carats and placed in a thin, flimsy setting will always look exactly like what it is. But a well-cut lab-grown diamond in a thoughtful setting, or a moissanite centre stone in a substantial design, can easily hold its own against rings costing three times more.

The seven designs below are the ones jewellers consistently recommend when couples ask for engagement rings under $2,000 that still look intentional, expensive, and built to last. Each one solves the budget problem differently — through stone choice, setting style, or proportion — and each one has a clear reason it works.

What Actually Makes a Ring Look Cheap

Before the list, a quick diagnostic. A ring usually reads as “cheap” for one of four reasons: the centre stone is too small for the setting, the metal is too thin (under 1.5 mm), the design tries too hard to imitate something more expensive, or the proportions feel off — like a chunky band paired with a tiny stone, or a delicate band trying to support an oversized halo.

Designs that succeed under $2,000 do the opposite. They commit to a clear visual idea, use a stone that suits the setting, and don’t try to disguise the budget. Honest design almost always ages better than a ring pretending to be something it isn’t.

1. Bezel-Set Solitaire with a Lab-Grown Diamond

A bezel setting surrounds the entire diamond with a thin rim of metal instead of traditional prongs. It’s also one of the designs that has benefited most from the rise of lab-grown diamonds in Australia. A 1-carat lab-grown round diamond in 14k gold with a bezel setting will often land between AUD $1,800 and $2,800 depending on the stone quality, though smaller stones or simpler bands can still sneak under the $2,000 mark.

The bezel makes the ring feel modern, polished, and substantial. It’s also practical for everyday wear, especially for Australians with active lifestyles, beach trips, or hands-on jobs. The metal edge subtly makes the stone appear larger, while the clean lines photograph beautifully. Pair it with a 2 mm polished band and the whole ring feels refined rather than budget-conscious.

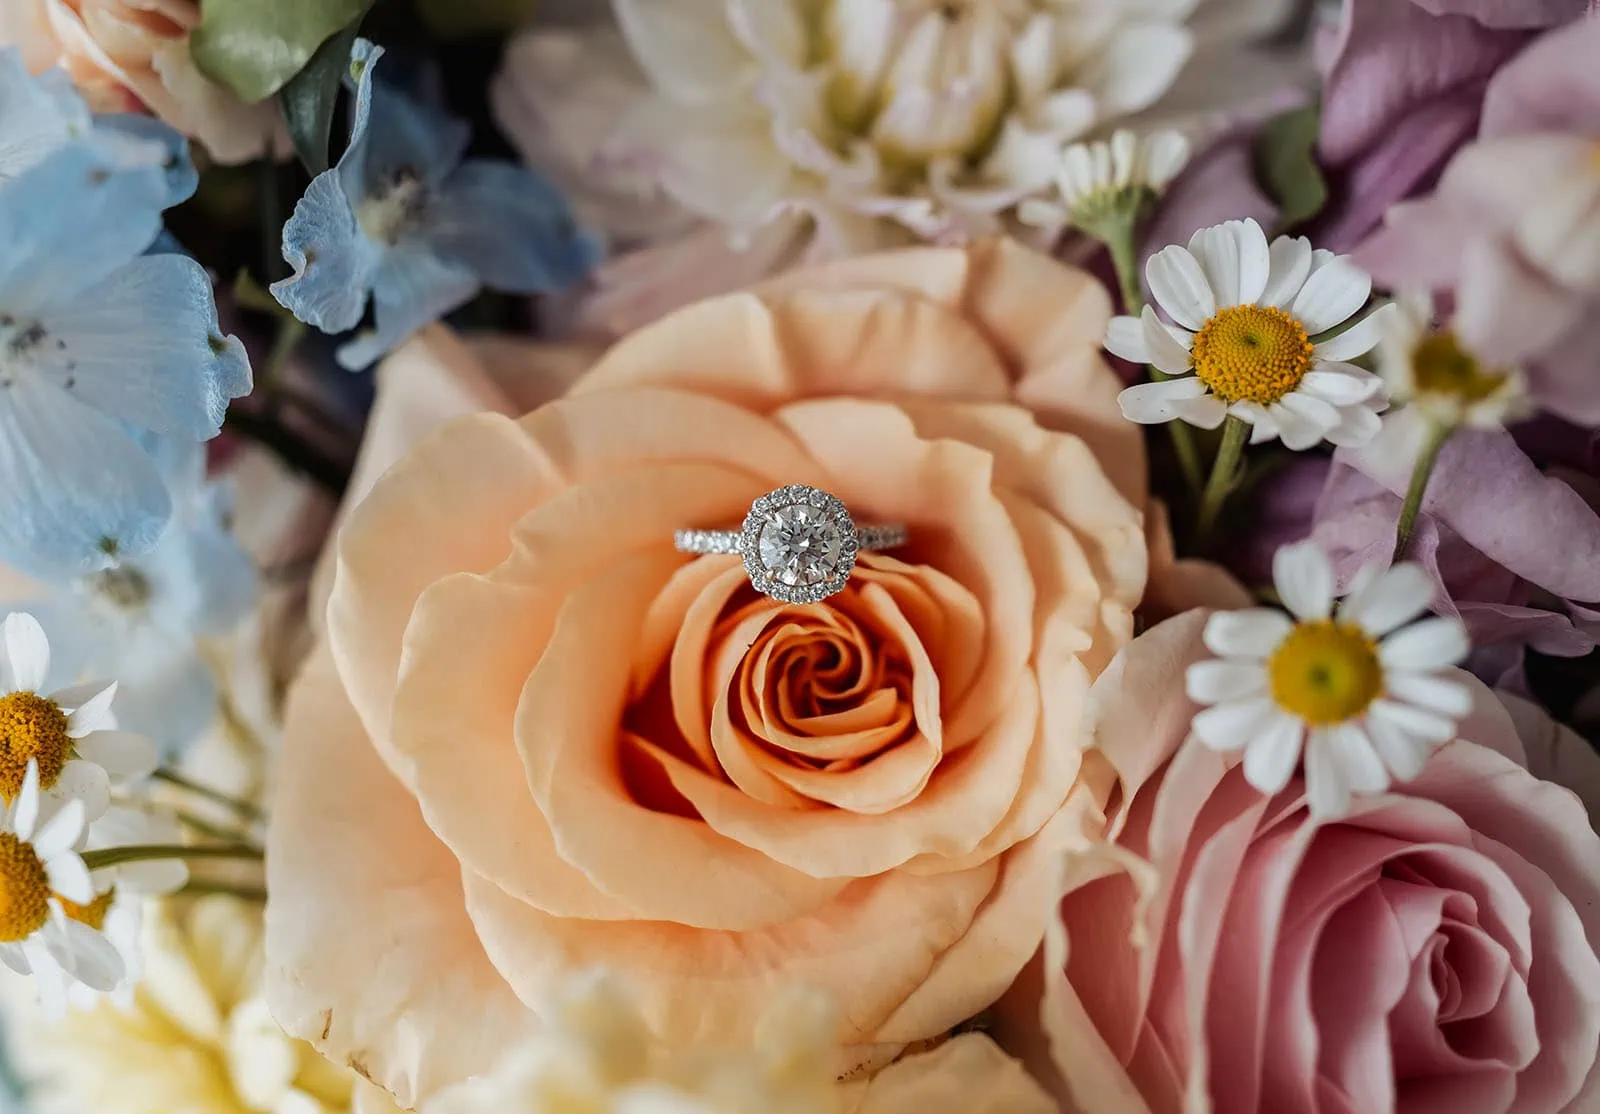
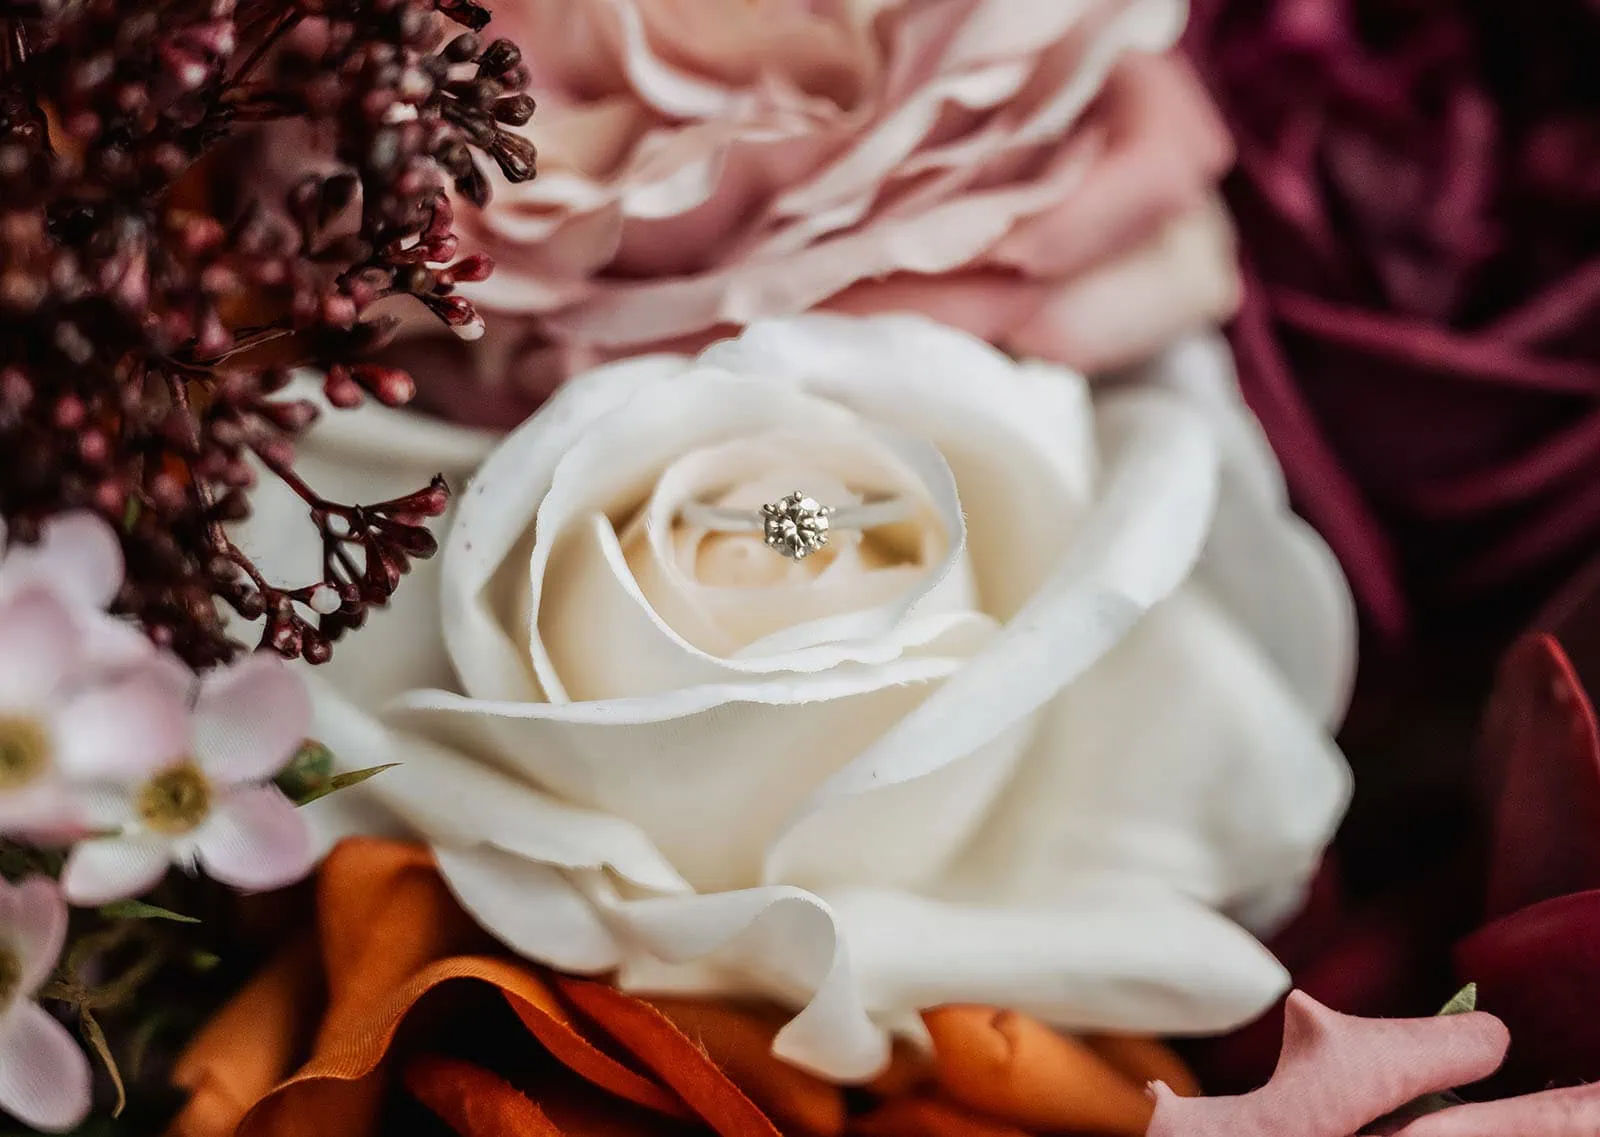
Engagement ring nestled in a romantic rose bouquet.
Engagement ring beautifully set within a lush rose bouquet.

2. Three-Stone Ring with Moissanite Centers

Moissanite — sitting at 9.25 on the Mohs hardness scale, second only to diamond — has become hugely popular in Australia because it delivers plenty of sparkle without the hefty price tag. A three-stone moissanite ring with a 1-carat centre and two smaller side stones in 14k white gold typically lands somewhere between AUD $1,000 and $1,800.

The three-stone design works brilliantly on a tighter budget because your eye reads the overall composition rather than focusing on a single centre stone. The symbolism of past, present, and future also still resonates with plenty of couples without feeling overdone. For anyone wanting maximum visual impact without pouring the entire budget into one diamond, this is one of the smartest designs dollar-for-dollar.

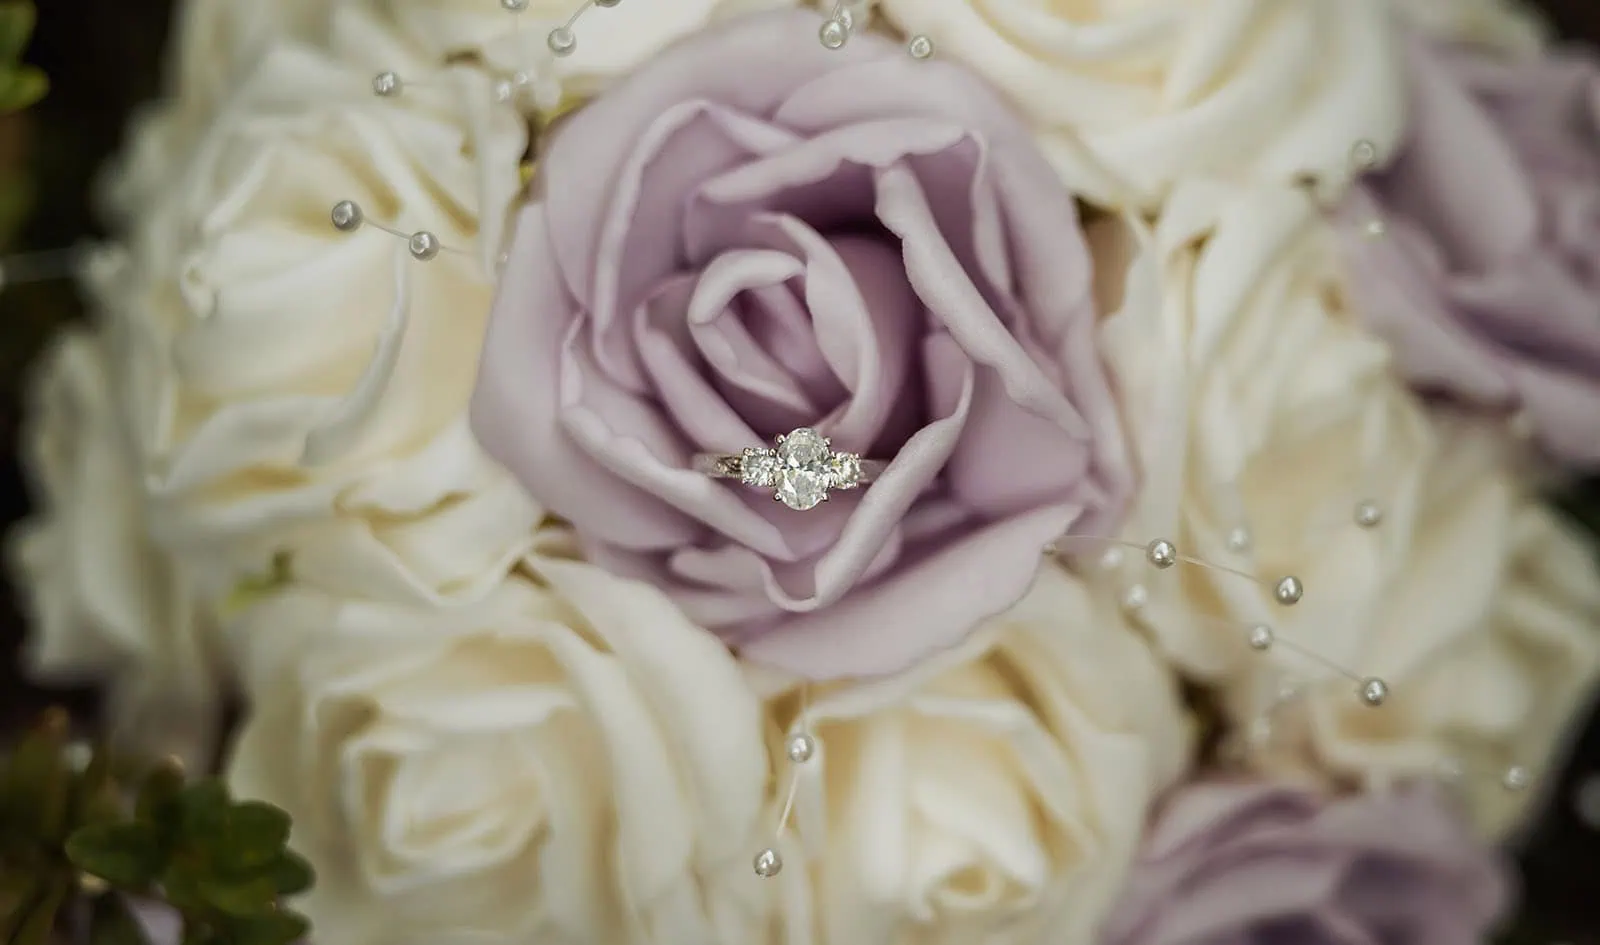
Engagement ring nestled in a lavender rose surrounded by white roses and delicate accents.
Lavender rose with diamond ring, surrounded by creamy white roses and pearlescent accents, creating a romantic and elegant celebration.

3. Salt-and-Pepper Diamond in a Vintage-Inspired Setting

Salt-and-pepper diamonds have become increasingly popular with Australian couples wanting something less traditional. These natural diamonds contain visible black and white inclusions, creating smoky, galaxy-like patterns that make every stone completely unique. Because they sit outside the standard “perfect diamond” grading obsession, prices stay far more accessible. A 1-carat salt-and-pepper diamond in a low-profile or bezel setting generally costs between AUD $1,200 and $2,000.

The aesthetic leans artistic and organic rather than flashy. The inclusions become the feature instead of the flaw. Pairing one with rose gold or yellow gold gives the ring a handcrafted, boutique jeweller feel that suits Australia’s relaxed approach to jewellery trends. Vintage-inspired details like milgrain edging or subtle engraving also help the ring feel far more expensive than the price suggests.

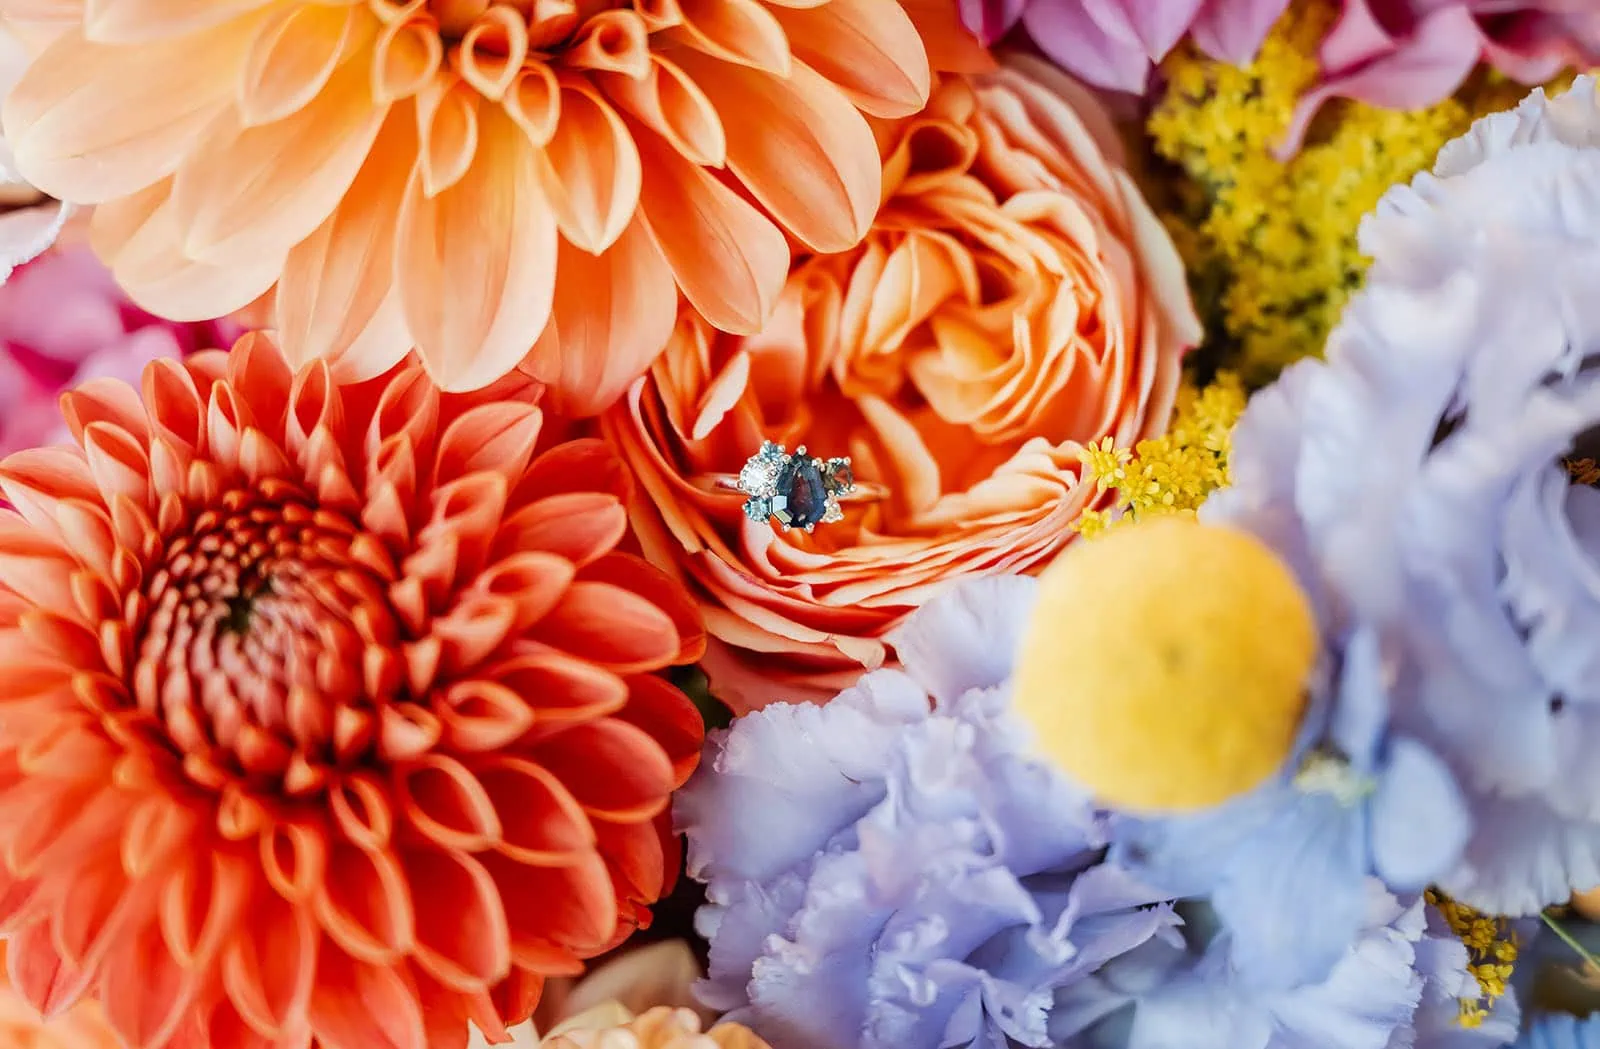
Bouquet with orange flowers, purple lisianthus, and ring featuring sapphire and diamonds.
A vibrant bouquet with orange and purple blooms showcases a sapphire and diamond ring, perfect for romantic occasions.

4. Pavé Solitaire with a Smaller, Higher-Quality Lab-Grown Center

The standard mistake at this budget is buying the largest possible centre stone and accepting poor cut quality. The smarter move is often the opposite: buy a smaller but beautifully cut stone and let the setting do the visual work. A 0.5-carat lab-grown diamond with an Excellent or Ideal cut grade, set in a pavé band with tiny accent diamonds, will usually sit between AUD $1,800 and $2,500 depending on craftsmanship and metal choice.

The pavé band creates continuous sparkle that draws the eye, while the centre stone — smaller but precisely cut — punches well above its carat weight. A well-cut 0.5-carat stone reflects more light than a dull 1-carat stone with poor proportions. This design suits couples wanting maximum sparkle without compromising on quality.

Engagement ring in white rose with colorful floral arrangement.
Engagement ring nestled in a white rose surrounded by vibrant, colorful blooms.

5. Hidden Halo with an Oval Moissanite

The hidden halo — a circle of tiny stones tucked beneath the centre stone and visible mainly from the side profile — has become one of the most requested bridal jewellery styles in Australia over the past few years. It adds sparkle and apparent size without the bulky appearance of a traditional halo. With a 1.5-carat oval moissanite centre, the entire ring generally lands between AUD $1,500 and $2,500 in 14k gold.

Oval cuts are especially effective at this budget because they visually appear larger than round stones of the same carat weight. A 1.5-carat oval can easily read closer to a 2-carat round on the hand. Combined with the hidden halo, the ring has strong presence without looking oversized or overdesigned.

Engagement ring nestled in a lavender rose surrounded by white roses and delicate accents.
Lavender rose with diamond ring, surrounded by creamy white roses and pearlescent accents, creating a romantic and elegant celebration.

6. Cluster Ring with Multiple Small Diamonds

Cluster rings — multiple smaller stones arranged into one cohesive design — have quietly made a comeback, especially among Australian couples wanting something vintage-inspired and distinctive. A cluster of lab-grown diamonds totalling roughly 0.75 to 1 carat in 14k yellow or rose gold generally falls between AUD $1,200 and $2,000.

The advantage is twofold: the total carat weight feels substantial, but no single stone needs to carry a huge price tag, and the design feels more handcrafted than mass-produced. Cluster rings photograph beautifully, age well, and often look far more expensive than they really are. The trade-off is maintenance — with more stones comes more prongs, making yearly jeweller check-ups important.

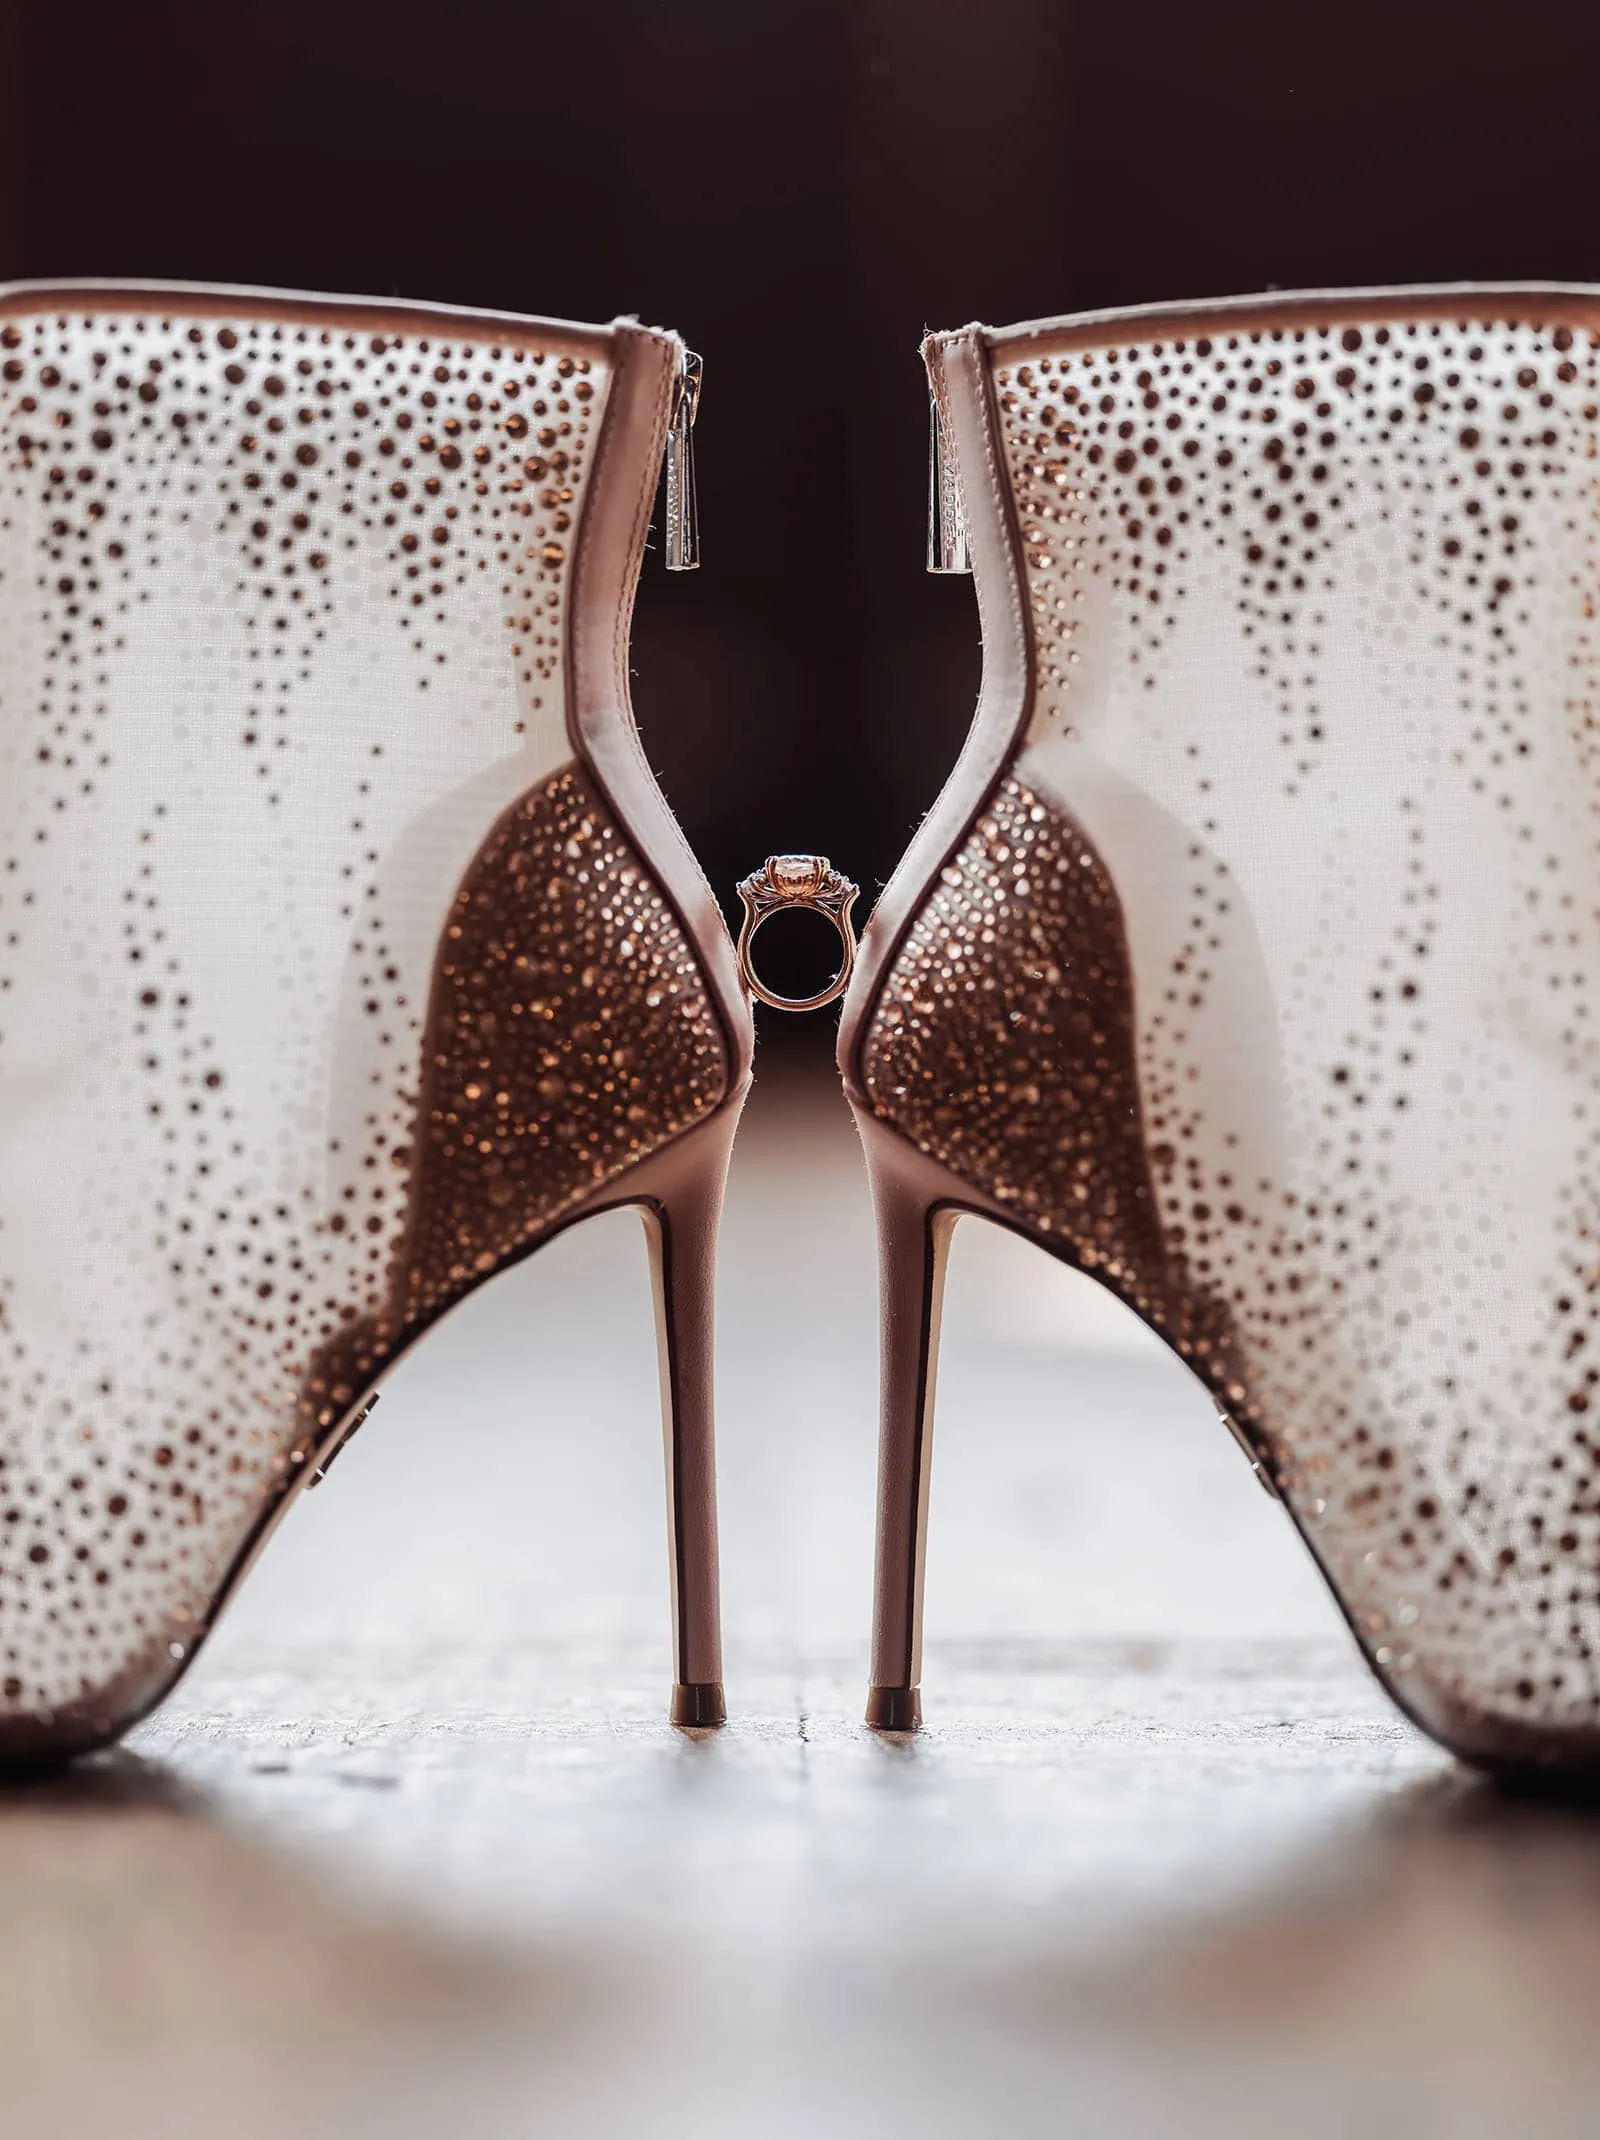
Elegant high-heeled shoes and engagement ring on reflective surface.
A pair of rhinestone-studded high heels and a sparkling engagement ring elegantly displayed on a reflective surface.

7. East-West Marquise or Pear with a Knife-Edge Shank

Most engagement rings position the centre stone vertically (north-south). Turning the stone horizontally — known as an east-west setting — instantly gives the ring a more modern, fashion-forward feel. A 1-carat marquise or pear-shaped moissanite set east-west on a knife-edge band in 14k gold generally falls between AUD $1,000 and $1,800.

The elongated shape spreads across more of the finger, creating the same visual impact couples often chase with larger stones. Meanwhile, the knife-edge shank catches light beautifully and adds sophistication without increasing the price. It’s the ideal design for someone wanting something contemporary rather than traditionally bridal.

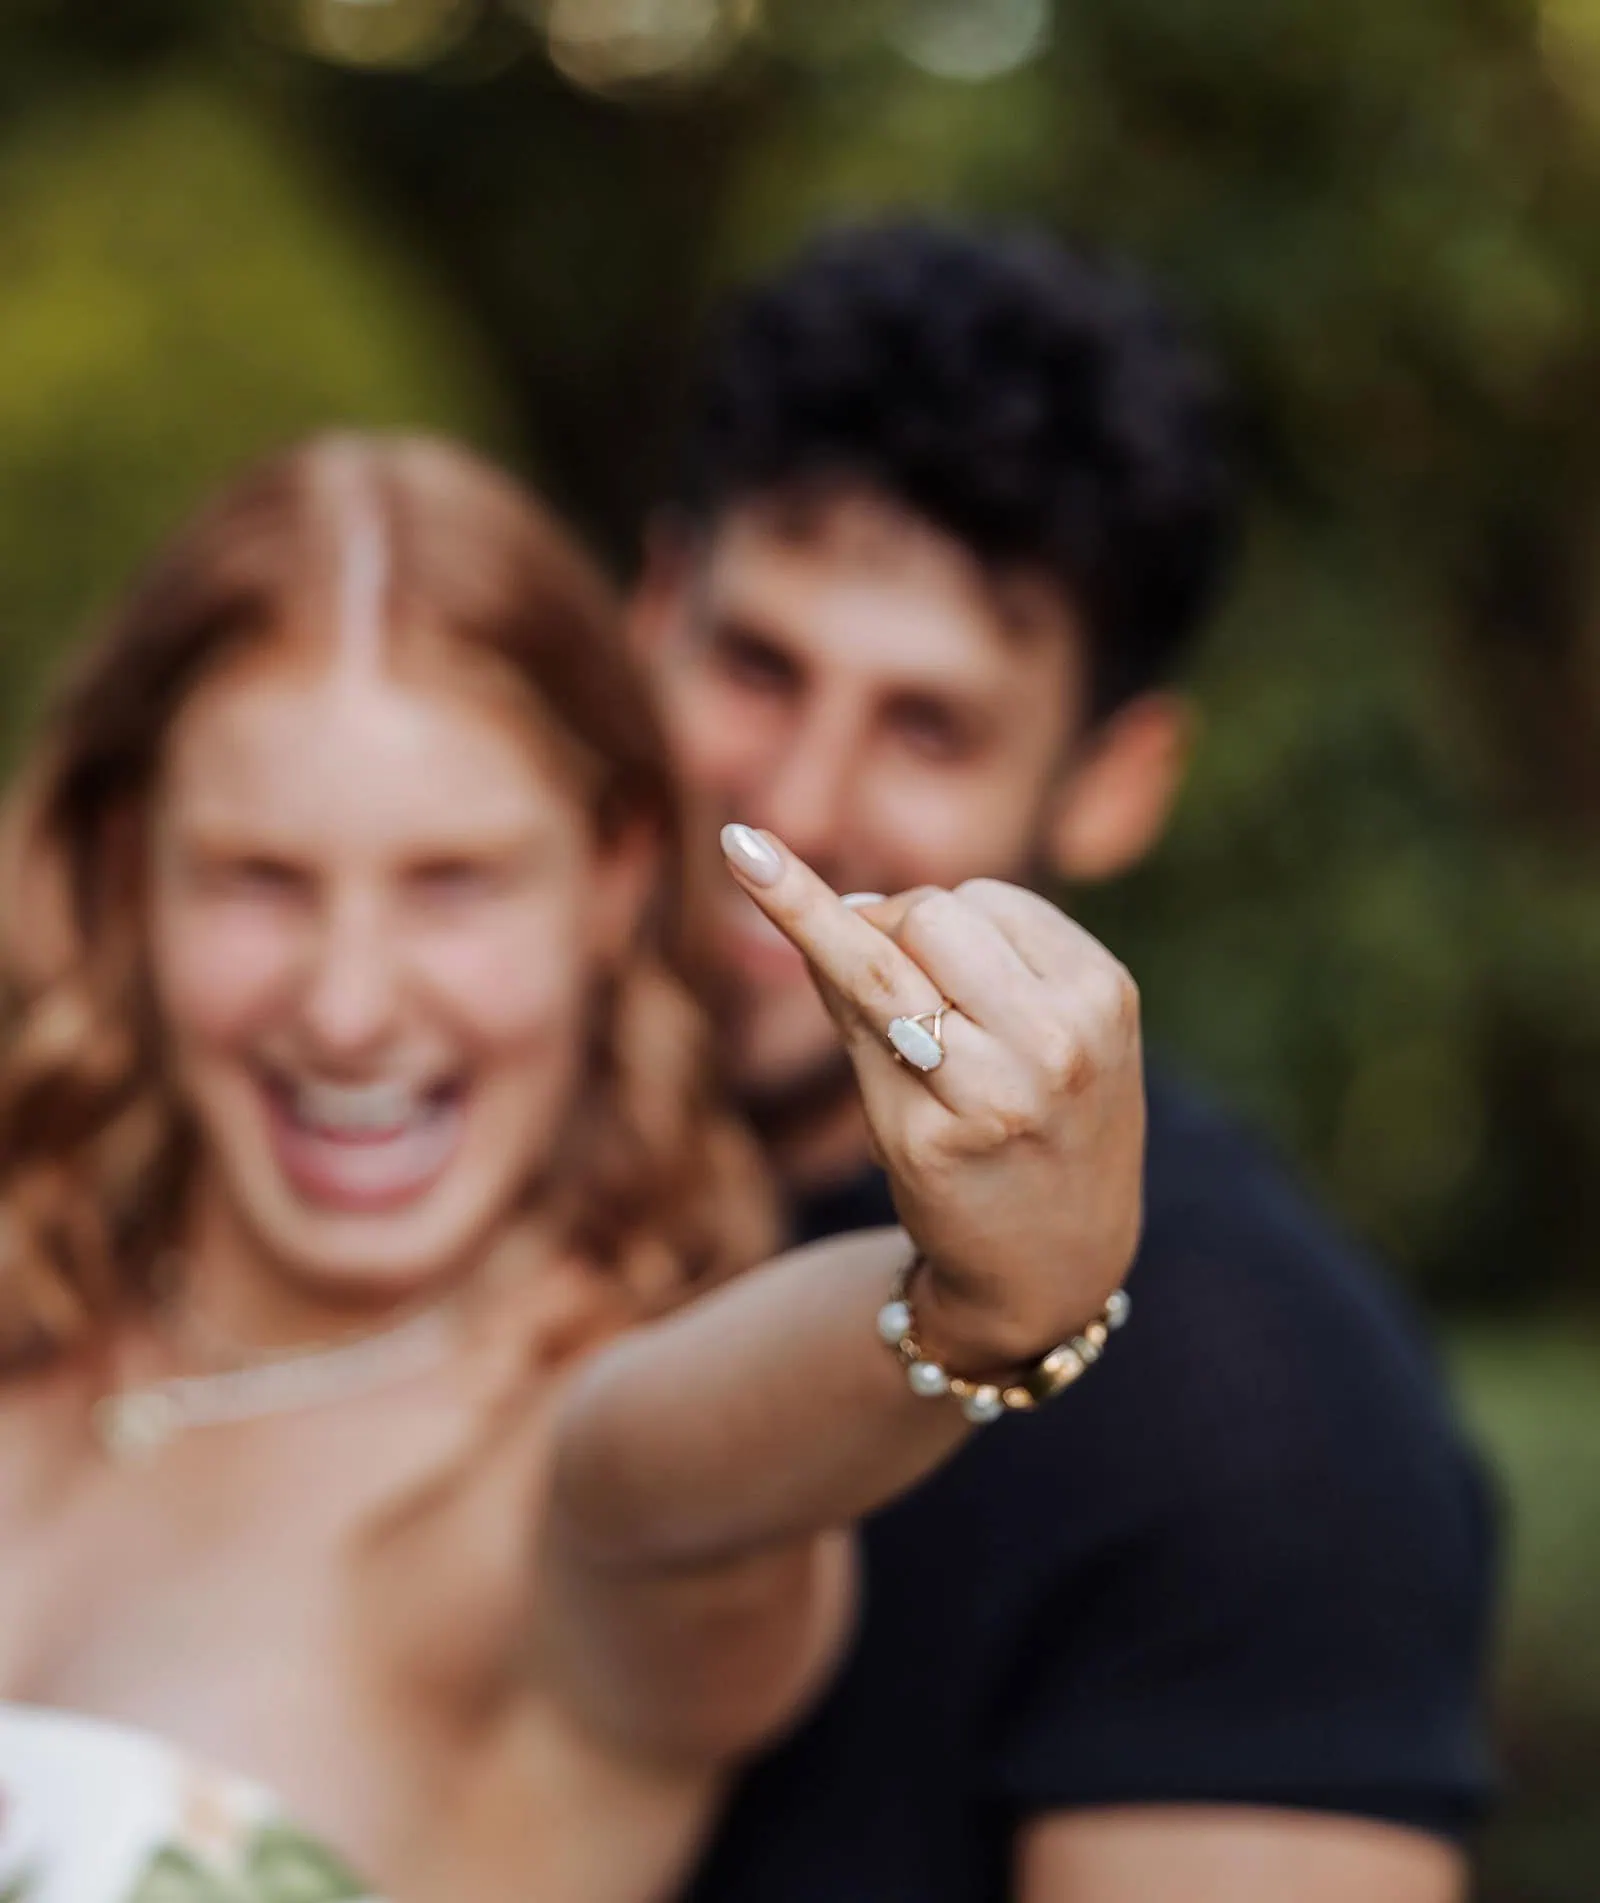
Woman showcasing engagement ring with partner in joyful outdoor celebration.
Engagement joy: Celebrating love with a sparkling ring amidst lush greenery.

What You’re Actually Paying For at This Price

A useful way to think about this budget is that around 40 to 50 percent of the price goes toward the metal and craftsmanship, while the remainder covers the centre stone. That’s exactly why lab-grown diamonds and moissanite dominate this price bracket — they allow the ring itself to maintain a higher level of quality and durability than a mined-diamond budget would normally allow.

A few specifics worth knowing:

  • Metal weight matters more than gold colour. A solid 14k gold ring with a 2 mm band generally uses around 3 to 4 grams of gold. Ultra-thin “dainty” bands use significantly less and tend to feel noticeably less substantial.
  • 14k gold is more practical than 18k for everyday wear. The higher alloy content makes it harder and more scratch-resistant, which suits daily use.
  • Setting style affects long-term maintenance. Pavé and cluster rings benefit from yearly prong checks, while bezel settings generally require less upkeep.

Where to Buy Without Getting Burned

Online lab-grown specialists consistently offer stronger value than many shopping centre jewellery chains at this price point. The trade-off is that you usually can’t see the ring in person beforehand. Reputable online jewellers offering return windows and certification provide enough flexibility to inspect the ring properly once it arrives.

Local Australian custom jewellers are also worth considering if you have a specific design in mind. Smaller independent studios working with lab-grown stones can often deliver a custom ring within the same budget that would cost considerably more through a major retail chain.

What to avoid: heavily discounted websites with no return policy, sellers without GIA or IGI certification for centre stones, and jewellers unwilling to disclose metal weight or stone specifications.

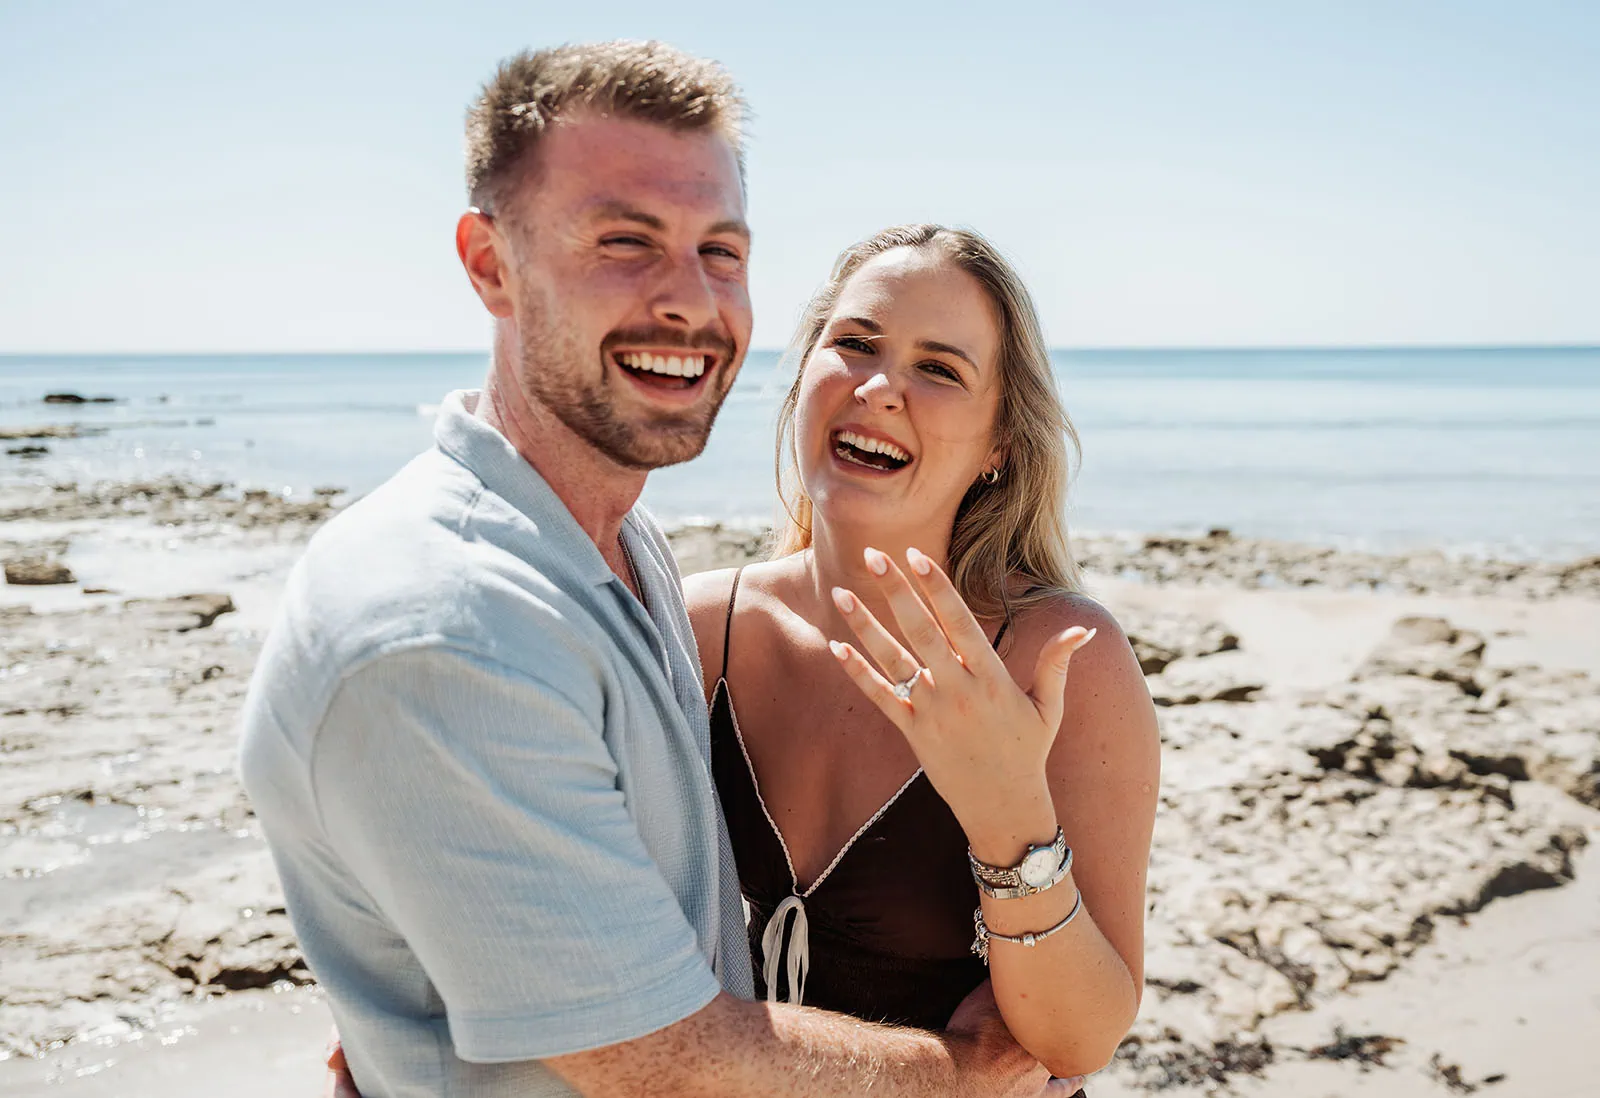
Engaged couple laughing on a sunny beach, showcasing ring and love.
Engaged couple shares a joyful moment on a sunlit beach, showcasing a sparkling ring and their love.

When $2,000 Won’t Be Enough

There are still situations where this budget genuinely won’t stretch far enough. If both partners want a large mined diamond over 1.5 carats, compromises in cut, clarity, or colour become very noticeable. Platinum settings also push costs considerably higher than gold due to the extra metal weight and density. Likewise, high-quality natural sapphires, emeralds, and rubies in larger sizes generally sit outside this price range.

In those situations, the best approach is usually straightforward: either increase the budget or adjust the expectations. Trying to force a $6,000 design into a $2,000 budget is what creates rings that visibly look cheap in the first place.

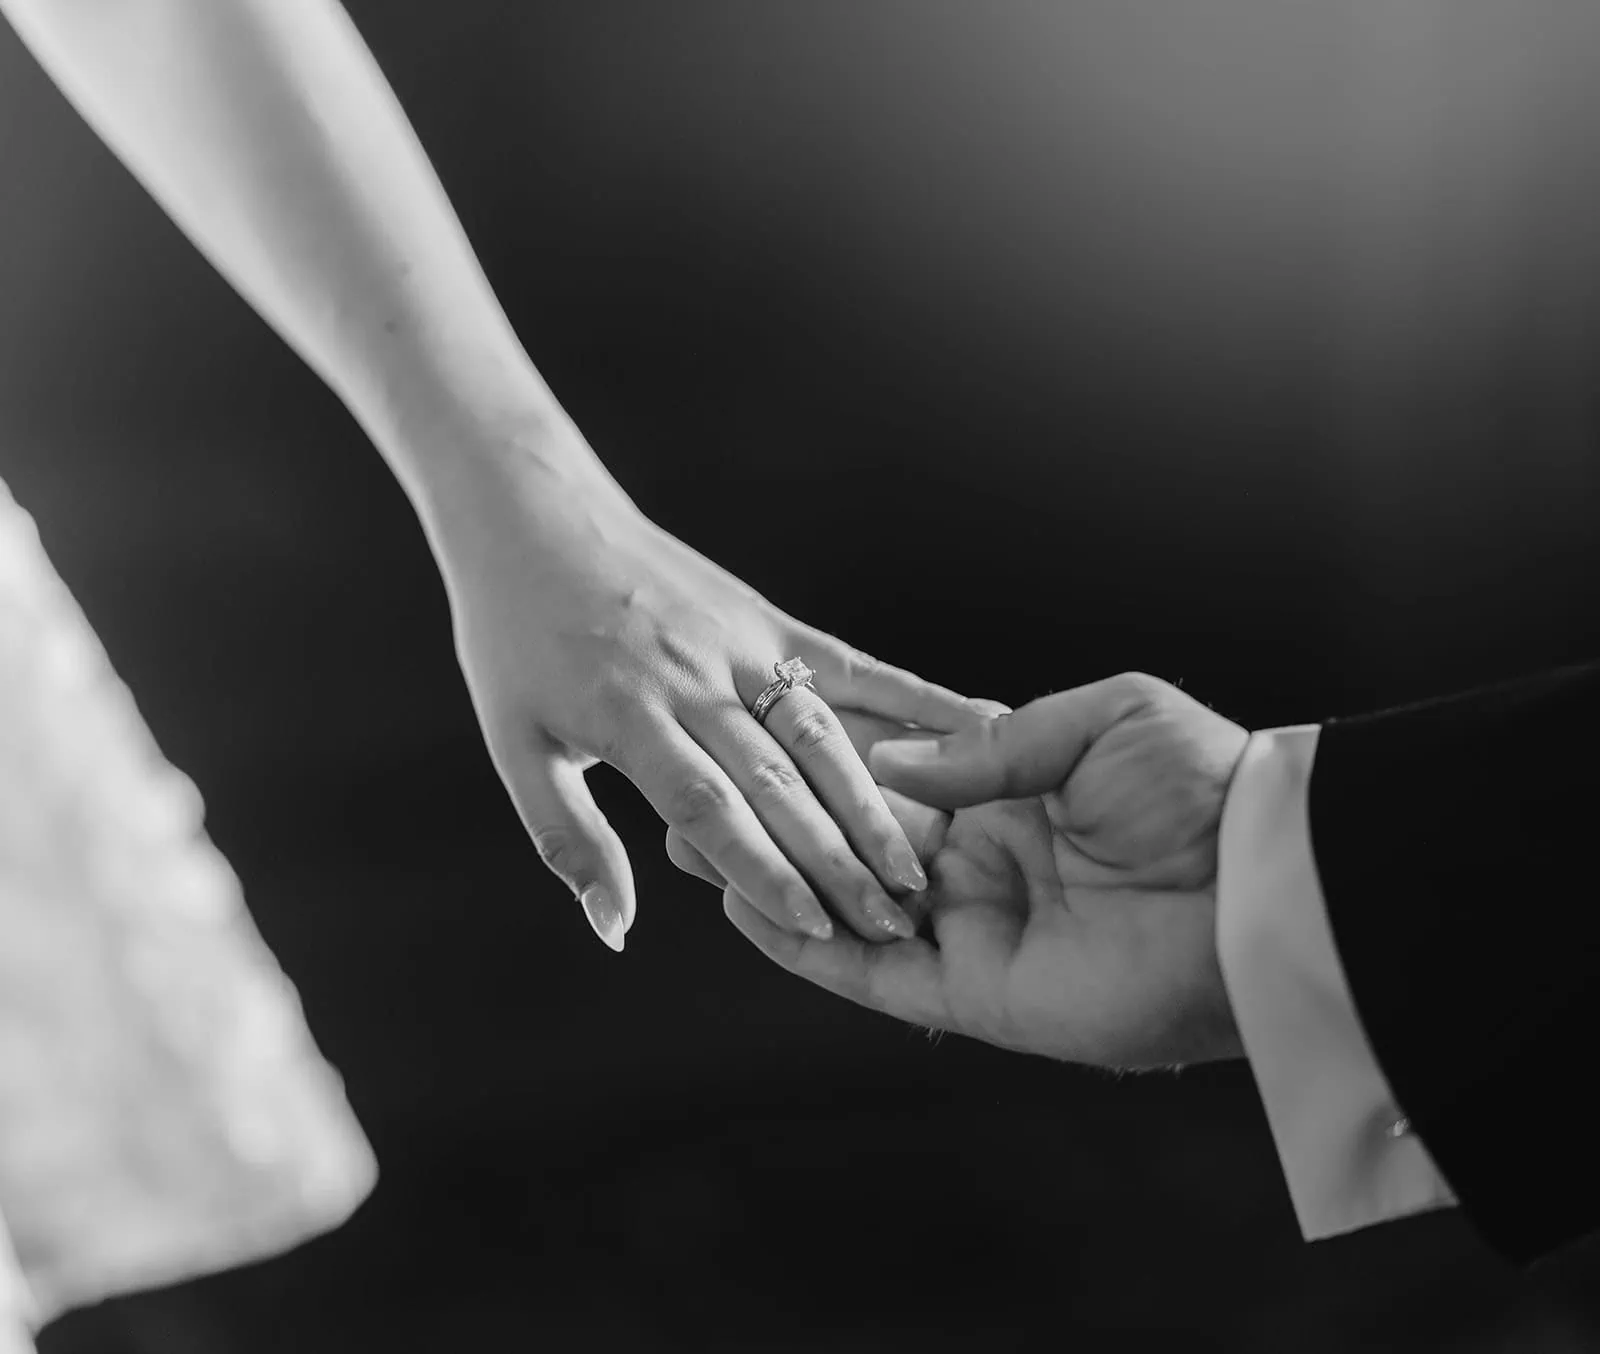
Elegant hands intertwine, highlighting a sparkling engagement ring in a timeless black and white photograph.
A timeless black and white moment capturing two hands united by love and commitment, highlighted by a sparkling engagement ring.

Frequently Asked Questions

Is a lab-grown diamond a “real” diamond? Yes. Lab-grown diamonds have the same chemical, optical, and physical properties as mined diamonds. They’re graded using the same standards through labs like GIA and IGI. The only real difference is origin.

Will a moissanite engagement ring look obviously fake? Not to most people. Moissanite reflects slightly more rainbow fire than a diamond, which is usually only noticeable in strong sunlight. In settings like three-stone or halo designs, the difference becomes very difficult to spot.

Can I find a 1-carat natural diamond engagement ring under $2,000? Technically yes, but compromises become obvious. Lower-grade natural diamonds often show visible inclusions, dullness, or colour tinting. In most cases, a smaller well-cut diamond creates a far better overall result.

Should I worry about resale value at this price? Engagement rings rarely retain strong resale value regardless of price point. Jewellery markups are difficult to recover on the secondary market, so it’s better to buy for enjoyment and everyday wear rather than investment potential.

What’s the smallest centre stone that still looks like a proper engagement ring? Roughly 0.5 carat for a round stone, around 0.7 carat for oval or pear shapes, and smaller again in cluster or three-stone settings where the combined design contributes to the overall visual impact.

Is white gold cheaper than yellow gold? At the same gold purity and weight, pricing is usually very similar. The main difference is maintenance — white gold requires occasional rhodium re-plating, while yellow and rose gold generally do not.

May 21, 2026/by Steven Duncan
Interesting

How to create your wedding photo timeline

Planning a wedding can feel like organising a small festival, and the photography often gets treated as something that will “just happen.” It won’t. Without a clear wedding photo timeline, key moments slip by, couples spend half the day rushing between locations, and photographers are left scrambling. Knowing how to create a wedding photo timeline changes all of that. A thoughtful, flexible photo schedule gives you a structure to lean on so you stay present, your photographer knows exactly what to capture, and nothing important gets missed.

Key takeaways

Point Details
Start with your ceremony time Work backwards from the ceremony to allocate time blocks for each photo session.
Build in buffer time 15-20 minute buffers before key events absorb delays and prevent a cascading schedule collapse.
Consult your photographer early Aligning expectations before the day avoids surprises and keeps everyone on the same page.
Flexible beats rigid A timeline as a flexible guide reduces stress and keeps the couple present, not clock-watching.
Organise photos after the day Use date-based file naming and back up in three separate locations to protect your memories long term.

Before you start building your timeline

There is groundwork to cover before you put pen to paper. Skipping this step is where most couples go wrong. You end up with a timeline that looks good on paper but falls apart the moment real life steps in.

The first thing to do is gather your confirmed ceremony and reception schedule details. Know your ceremony start time, venue changeover windows, and how far apart your locations are. From there, think about the specific photo moments you actually want. Common ones include:

  • Getting ready shots with your wedding party
  • A first look with your partner before the ceremony
  • Ceremony coverage (processional, vows, rings, kiss)
  • Family formals and group photos
  • Couple portraits at golden hour
  • Reception highlights (speeches, first dance, cake cutting)

Once you have that list, talk to your photographer and planner before finalising anything. This conversation is one of the most useful things you can do. Your photographer will tell you what is realistic, how much travel time you need between venues, and where natural light will be at its best.

Time allocation matters more than most couples expect. Experts recommend 60 to 90 minutes for getting ready photos alone, because that window captures the candid, emotional detail shots that often end up being the most treasured images of the whole day.

Pro Tip: Ask your photographer to share a sample timeline from a previous wedding at a similar venue. It gives you a concrete reference point and often surfaces timing issues you hadn’t considered.

How to build your wedding photo schedule step by step

Once the groundwork is done, building the actual timeline is more straightforward than it sounds. Work backwards from your ceremony time rather than forwards from when you wake up. This anchors everything to the moment that matters most.

Here is a step-by-step approach that works well for most Australian weddings:

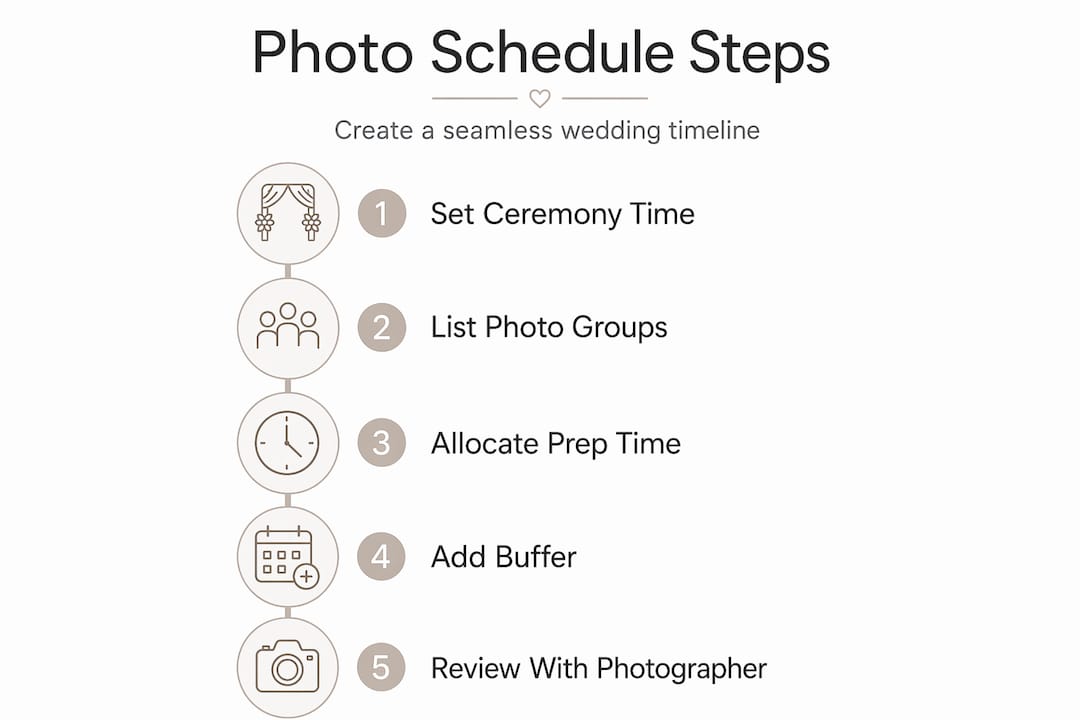
  1. Lock in your ceremony time. This is your anchor. Everything else is built around it.
  2. Work backwards to calculate getting ready time. If your ceremony is at 3 pm, and you want 90 minutes of getting ready coverage plus 30 minutes of travel, your photographer needs to arrive by 1 pm at the latest.
  3. Decide whether you want a first look. A 30-minute first look window gives you and your partner an unhurried, intimate moment that also takes pressure off the post-ceremony portrait session. If you skip it, plan for that time elsewhere.
  4. Allocate time blocks for each photo session. Family formals typically need 20 to 30 minutes for small groups, and longer if you have a large extended family. Couple portraits work best with 45 to 60 minutes, ideally timed around golden hour.
  5. Add buffer periods. Place 15 to 20 minute buffers before the ceremony and after family portraits. These small windows absorb the minor delays that always happen without derailing the rest of your day.
  6. Plan for guest photo sharing during cocktail hour. If your photographer or videographer offers a QR code sharing system, cocktail hour is the perfect moment for guests to upload their own candid shots without needing an app. It enriches your photo collection with perspectives you would never get otherwise. You can read more about how this works through Svenstudios’ guide on QR guest photo sharing.
  7. Review the full draft with your photographer and planner. A final check before the day catches conflicts and confirms the timeline is genuinely achievable.

Pro Tip: Consider natural light when scheduling couple portraits. The hour before sunset in Adelaide produces the warmest, most flattering light. If your venue allows it, plan your portrait session to end at golden hour rather than begin there.

Common timeline pitfalls and how to avoid them

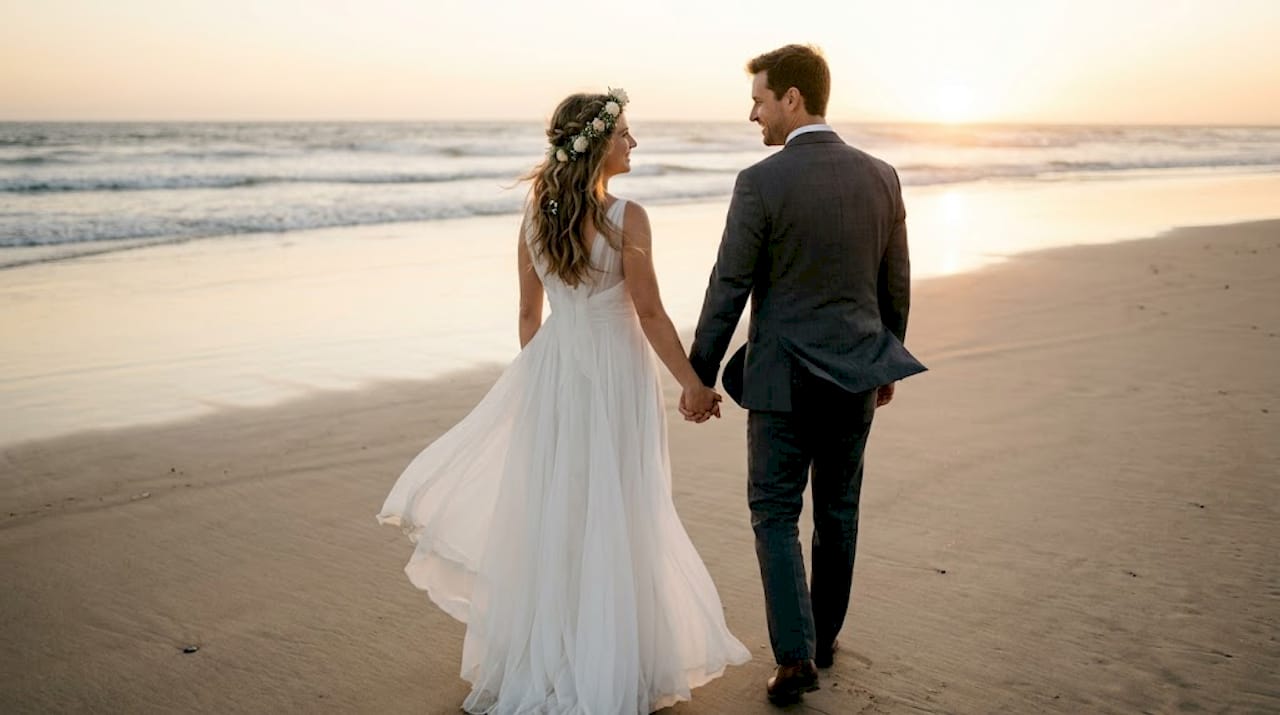
Wedding couple walking at sunset outdoors

Even well-planned timelines hit trouble. Knowing where things tend to go wrong helps you prepare rather than panic.

The most common mistake is building a minute-by-minute schedule that leaves no room to breathe. When every moment is accounted for with zero flexibility, one slow family member or a missing boutonniere throws the whole day into chaos. A well-constructed wedding photography timeline functions like a flexible guide, not a strict programme. Give yourself permission to build in breathing room.

Family portrait sessions are another common sticking point. Without preparation, these sessions drag on far longer than expected. A detailed shot list handed to your photographer ahead of time, combined with a trusted family member or wedding party member who can gather people quickly, makes an enormous difference. Detailed shot lists and designated helpers are the two most practical tools for keeping this portion of the day on track.

A few other pitfalls worth noting:

  • Skipping the first look without adjusting the timeline. Without a first look, all couple and wedding party portraits shift to after the ceremony, which compresses cocktail hour and can leave guests waiting. If you choose this approach, extend your cocktail hour by at least 20 minutes.
  • Forgetting travel time. Driving between a church, a garden, and a reception venue adds up quickly. Factor in actual travel time, not optimistic estimates.
  • Not communicating the timeline to key people. Your photographer, celebrant, wedding party, and parents should all have a copy of the schedule before the day.

Organising and storing your wedding photos after the day

The planning does not stop when the reception ends. How you organise and store your wedding photos shapes how easily you can revisit and share them for years to come.

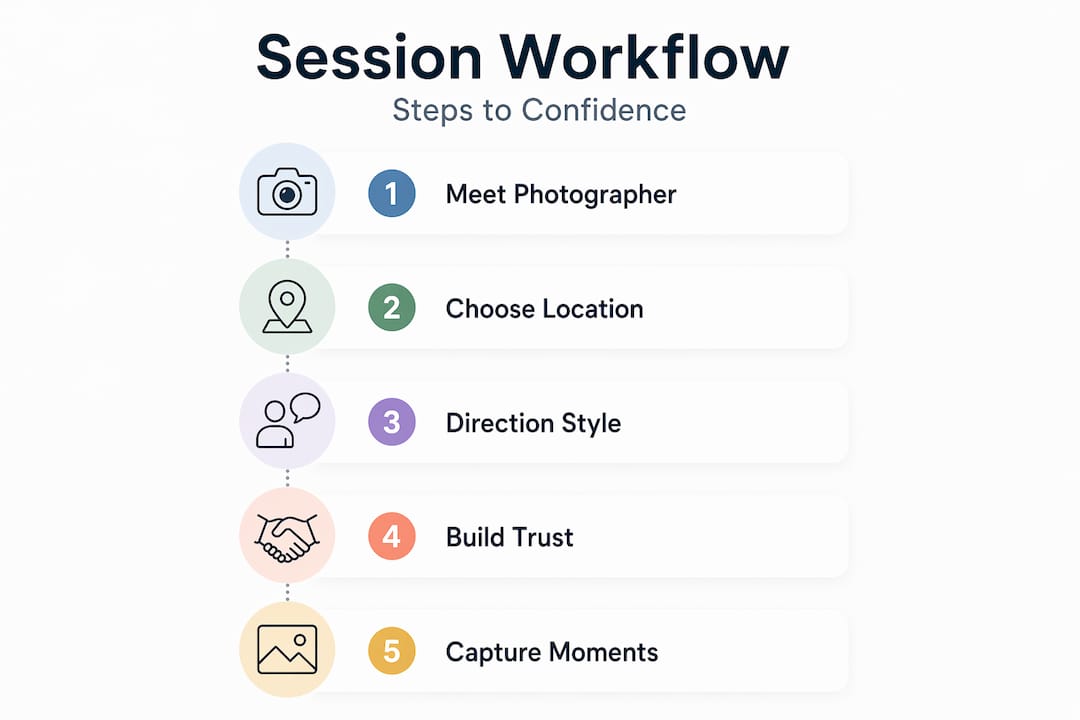
Infographic showing five steps for photo timeline

Here is a practical approach to post-wedding photo management:

Task Recommendation
Back up your photos Follow the three places rule: one copy on your computer, one on an external drive, and one in cloud storage
File naming Use a date-based naming system such as YYYY-MM-DD-WeddingName-001 for easy chronological sorting
Folder structure Organise digital folders by moment type: getting ready, ceremony, portraits, reception
Physical albums Consider ordering a printed album or photo book within the first six months while the memories are fresh
Sharing with family Use a shared cloud folder, a private gallery link, or a printed album to make sharing simple

Approximately 1,000 high-resolution wedding images take up around 20GB of storage. Cloud services like Google Photos or iCloud handle this comfortably, but pairing cloud storage with a physical external drive gives you genuine peace of mind.

For ideas on how to organise what you actually want captured, the Svenstudios wedding photography checklist is a practical starting point.

My honest take on wedding photo timelines

In my experience, the couples who enjoy their wedding day most are the ones who treated the timeline as a rough guide rather than a script. I have photographed weddings where everything ran perfectly to the minute, and I have photographed weddings where nothing went to plan. The difference in how the couple felt was rarely about the schedule itself. It was about whether they had given themselves enough room to adapt.

What I have found actually works is building the timeline with generous buffers, then mentally committing to the fact that you will not watch the clock. Knowing the plan is solid enough to bend gives you the confidence to be present. I have also seen, time and again, that a 30-minute first look session pays dividends across the whole day. It reduces the pressure on post-ceremony portraits, gives you a genuinely intimate moment, and usually produces some of the most beautiful images of the entire wedding.

My advice: be thorough in the planning, then let go on the day. For tips on planning candid portraits that do not feel posed or rushed, that mindset carries through to every frame.

— Steven

Work with Svenstudios to bring your timeline to life

At Svenstudios, Steven and Luisa work with you before the day to build a wedding photo schedule that fits your personality, your venue, and the moments you care about most. No cookie-cutter approach here. Every couple gets a personalised photography experience designed around their day, including timeline guidance, shot lists, and a relaxed, candid approach that captures real emotion without making you feel like you are being directed in a film. If you are getting married in Adelaide and want to feel genuinely comfortable in front of the camera, get in touch to start the conversation.

FAQ

How far in advance should I plan my wedding photo timeline?

Start at least three months before your wedding date. This gives you time to consult your photographer, refine your shot list, and confirm venue logistics without rushing.

How long should I allow for family portraits?

Allow 20 to 30 minutes for a small family group and up to 45 minutes if you have multiple extended family combinations. A designated helper who can round people up makes a significant difference to how smoothly this runs.

Do I need a first look to have a good photo timeline?

No, but skipping a first look means all couple portraits shift to post-ceremony, which compresses your cocktail hour. If you prefer not to have a first look, simply extend the cocktail period to accommodate the portrait session.

How much buffer time should I build into my schedule?

Build 15 to 20 minutes of buffer before the ceremony and after family portraits at a minimum. These small windows prevent minor delays from becoming major ones.

What is the best way to organise wedding photos after the wedding?

Back up your photos in three locations, use a date-based folder and file naming system, and organise images by moment type for easy retrieval. Ordering a physical album within six months keeps the memory fresh and tangible.

Recommended

  • Capture Your 2026 Love Story: Top Wedding Photography Trends
  • Create A Personalised Wedding Photography Experience
  • Your Ultimate Wedding Photography Checklist For Authentic Moments
  • Stunning Wedding Album Examples To Inspire Your Day
May 21, 2026/by Steven Duncan
Interesting

What is a virtual reality wedding video?

Your wedding day happens once, and traditional video captures only what the camera points at. A virtual reality wedding video changes that entirely. Instead of watching your day unfold on a flat screen, you step back inside it. You can look left to see your guests’ reactions, turn right to catch your partner’s expression, or glance up at the venue ceiling. If you’ve been wondering what is a virtual reality wedding video and whether it’s worth exploring, this article will walk you through exactly how it works, what makes it different, and whether it’s right for your wedding.

Key takeaways

Point Details
VR videos are 360-degree recordings They capture the full environment around the camera, letting viewers look in any direction.
Remote guests can feel truly present VR live streaming allows family and friends interstate or overseas to experience your wedding immersively.
Venue planning becomes more informed 360-degree walkthroughs help couples visualise décor, lighting, and layout before the big day.
Hiring experienced professionals matters VR filming requires specialist skills and careful camera placement that only trained videographers can deliver.
VR works alongside traditional video Most couples combine VR recordings with highlight reels for a complete wedding media package.

What is a virtual reality wedding video?

A virtual reality wedding video is a 360-degree immersive recording that captures the entire environment surrounding the camera, not just what’s in front of it. When you watch one through a VR headset or even on a smartphone screen with a compatible app, you can look in any direction as if you are physically standing in that space. It’s the closest thing to actually being there, after the fact.

Traditional wedding videography frames specific moments through a single lens. A VR wedding video, by contrast, captures the full spatial context of your day, including the way the light fell across the ceremony space, how your guests filled the room, and the general atmosphere that no edited highlight reel can fully convey. 360-degree video enables interactive storytelling that preserves atmosphere in ways flat video simply cannot.

The technology behind VR wedding recordings typically involves:

  • Multi-camera rigs or dedicated 360-degree cameras positioned at key points throughout the venue
  • Careful placement strategy, often centrally within the scene, to capture all angles without disrupting the event
  • Post-production stitching, where footage from multiple lenses is merged into a single seamless spherical video
  • Compatible playback devices, from VR headsets like Meta Quest to basic smartphone cardboard viewers

Camera placement is critical in VR filming. Unlike traditional videography where the camera person can duck behind guests or stay out of frame, a 360 camera sees everything. There’s nowhere to hide. This demands a level of planning and discretion that most standard videographers aren’t trained for.

Pro Tip: Ask any VR videographer you consider hiring to show you a sample 360 video from a previous wedding before you commit. How they’ve managed camera visibility and integrated into the event tells you a lot about their skill level.

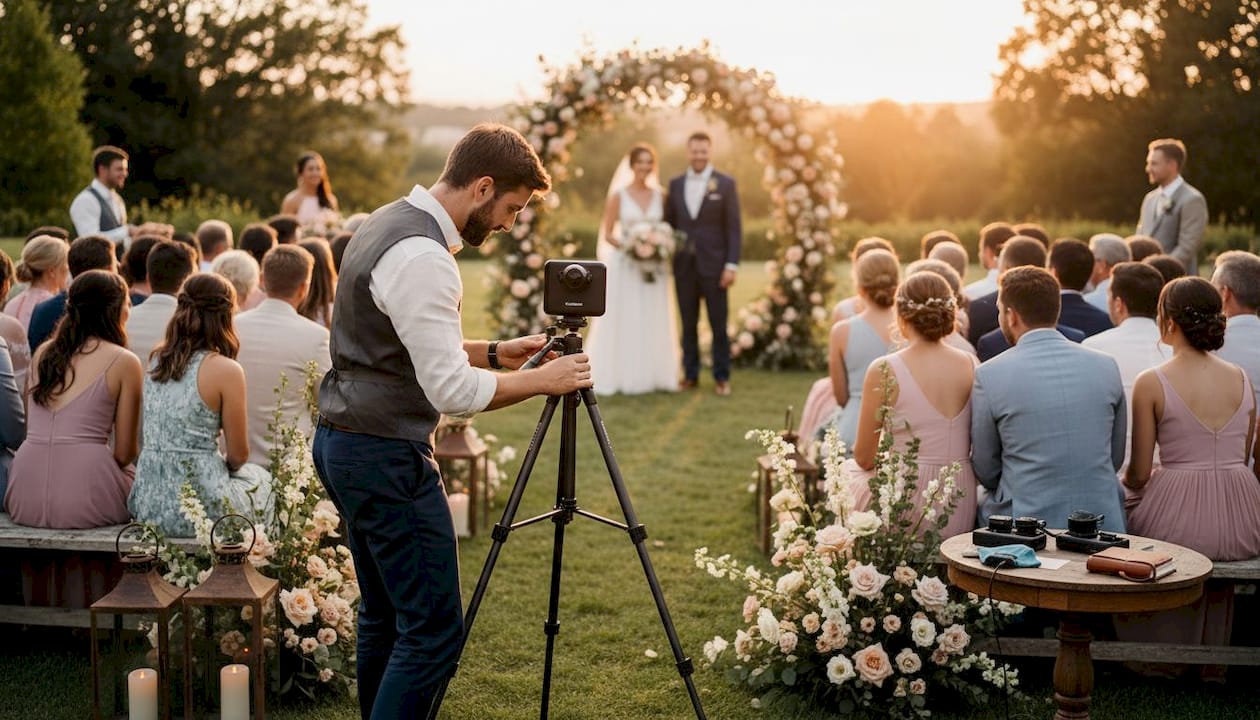
Videographer setting up VR camera at wedding

Benefits of VR wedding videos

The reasons couples and planners are gravitating toward virtual reality wedding recordings go well beyond novelty. There are genuinely practical and emotional benefits worth considering.

  1. Relive your day from every angle. Traditional videos show you the story as the editor tells it. VR recordings let you revisit the spatial reality of the day on your terms. You choose what to look at and when.

  2. Include guests who couldn’t be there. VR services facilitate full remote presence through live streaming immersive content, giving interstate or overseas family members an experience far richer than watching a flat livestream feed.

  3. Improve venue planning decisions. 360 virtual tours help couples explore layout, lighting, and décor interactively before committing to a venue, reducing unwelcome surprises on the day.

  4. Create a genuinely interactive keepsake. Rather than a film you watch passively, a VR wedding video is something you experience. You can share it with grandchildren decades from now and they’ll understand the atmosphere of the day in a way no photo album allows.

  5. Serve venue and vendor marketing. Venues that capture 360 content from real weddings have a powerful marketing tool, one that lets prospective clients visualise the space in use.

The VR wedding planning market is projected to grow at 34.10% as of late 2025, with the US market alone valued at USD 1,529.6 million. That trajectory reflects a genuine shift in how couples expect to document and share their weddings. VR integration is moving from novelty to normal practice.

Pro Tip: If you have elderly relatives or close friends who cannot travel, speak to your videographer early about a VR live stream setup. The difference between watching a flat video call and experiencing a 360 recording is significant, and planning for it in advance avoids technical headaches on the day.

Virtual reality wedding examples and use cases

Understanding the technology is one thing. Seeing how it actually gets used helps it click.

  • Ceremony and reception capture. The most common use is placing a 360 camera at the altar or ceremony space, capturing the full scene including the aisle, guests, and backdrop simultaneously. When you watch it back, you’re standing at the centre of your own wedding.

  • Destination and hybrid weddings. Couples marrying abroad or interstate are using VR to connect far-away guests with a live immersive feed, making physical distance feel considerably smaller.

  • VR albums as post-wedding keepsakes. Some couples commission full VR albums covering the ceremony, reception, and even pre-wedding celebrations. These become immersive recordings you can return to for years.

  • Proposals in VR environments. A growing trend involves creating a personalised virtual world for the proposal itself, from a recreated first-date location to a fantastical scene built entirely in software.

  • Metaverse and virtual weddings. Couples who want to hold at least part of their celebration online are hosting receptions in virtual environments, where guests attend as avatars and the entire event is captured as a VR film.

These examples reflect a broader truth about the role of virtual reality in weddings. It’s not replacing the physical day. It’s extending it, preserving it, and making it accessible in ways that weren’t possible even five years ago.

Practical things to consider before booking

Before you commit to adding a VR component to your wedding, there are several factors worth working through carefully.

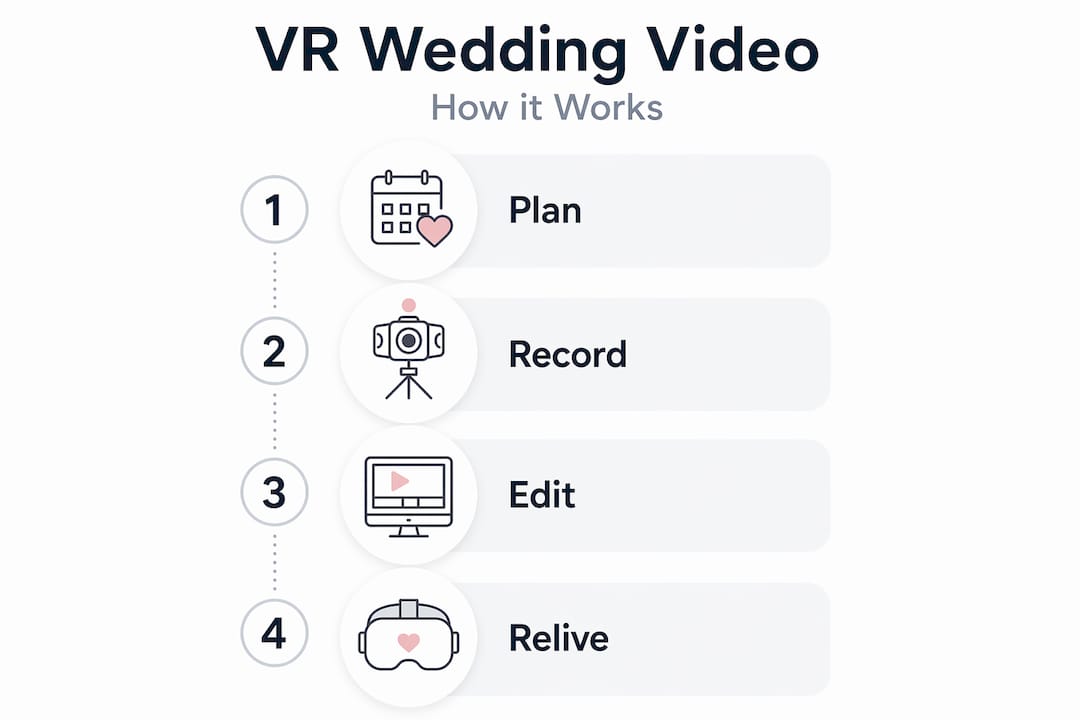
Infographic showing 4 steps of VR wedding video

Consideration What to ask or do
Videographer experience Request a VR-specific portfolio and ask how they handle camera visibility
Viewing equipment Confirm whether headsets will be provided for guests or if phone-based viewing suffices
Integration with traditional video Discuss how VR footage complements your highlight reel or ceremony film
Venue permissions Check that the venue allows additional camera equipment and rigging
Budget VR adds complexity and editing time, so expect a separate cost above standard videography

Wedding videography has no second takes. VR filming intensifies that pressure because the camera sees the entire room at once. Hiring someone with genuine experience in immersive recording is not optional. It’s the difference between a compelling VR experience and footage that feels disorienting.

VR services often supply headsets and technical assistance for remote guests, which takes a lot of logistical pressure off your shoulders. Ask about this when you’re comparing providers.

Pro Tip: Don’t replace your traditional videographer with a VR-only option. The two formats serve different purposes. A professional wedding highlight film delivers a curated emotional narrative, while the VR recording gives you the raw spatial experience of being there. You want both.

My honest take on VR wedding videos

I’ve been photographing and filming weddings in Adelaide for years, and I’ll be honest: when VR wedding recording first crossed my path, I was sceptical. It felt like a tech novelty that couples would book once and rarely revisit. I’ve since changed my mind.

What shifted my thinking was watching a couple put on headsets and step back into their ceremony twelve months after their wedding. The looks on their faces were not the look of someone watching a video. It was something closer to remembering. The spatial detail, the ambient sound, the feeling of standing in that room again. That response is real and repeatable.

What I’ve also learned is that technology cannot replace the human elements of wedding planning. VR cannot manage the conversation with the mother-in-law who has a conflicting seating preference, or replace the trust a couple builds with their photographer over months of communication. It’s a powerful tool, not a substitute for experience and care.

My honest recommendation? Approach VR as a complement, not a replacement. Combine it with a well-crafted videography approach from people who understand both the technical and emotional sides of the day. When those two things come together, the results are genuinely extraordinary.

— Steven

Explore immersive wedding video options with Svenstudios

At Svenstudios, Steven and Luisa specialise in capturing authentic, emotion-filled wedding stories across Adelaide and beyond. Their services include professional wedding videography, cinematic highlight films, and immersive VR recording options designed to preserve every dimension of your day. Whether you want a beautifully edited film that tells your story in three minutes, or an immersive 360 recording that puts you back in the room years from now, the team can help you work out what’s right for you. Reach out to discuss a personalised package and find out how VR fits into your broader wedding media vision.

FAQ

What is a virtual reality wedding video exactly?

A virtual reality wedding video is a 360-degree immersive recording of your wedding that viewers can watch through a VR headset or compatible device. It captures the full environment around the camera, allowing viewers to look in any direction as if they were physically present at the event.

How do guests watch a VR wedding video?

Guests can watch VR wedding recordings through a VR headset, a smartphone inserted into a cardboard viewer, or a compatible app that enables 360-degree navigation. Equipment provision by VR services is common for remote guests to make this easier.

How much does VR wedding videography cost?

VR wedding videography typically costs more than standard videography due to specialised equipment and additional post-production editing time. Pricing varies widely depending on the provider, scope of coverage, and whether the package includes equipment for guests. Request itemised quotes from any provider you speak with.

Can I combine a VR video with a traditional wedding highlight film?

Yes, and most experienced videographers recommend doing exactly that. The two formats complement each other well. A highlight film delivers a curated emotional narrative while the VR recording gives you an immersive spatial memory of the full event.

Is VR wedding videography available in Australia?

Yes. The service is growing across Australia, with providers in major cities and regional areas offering varying levels of VR capability. The VR wedding market is expanding rapidly, making it increasingly accessible for Australian couples planning their wedding in 2026 and beyond.

Recommended

  • Wedding Highlight Films: Capture Your Story In Moments
  • Drone Wedding Videography: Elevate Your Story In Australia
  • Wedding Videographer Roles Explained For Your Adelaide Film
  • Why Hire A Wedding Videographer For Your Adelaide Wedding
May 19, 2026/by Steven Duncan
Interesting

How to pose naturally for wedding photos

Most couples feel at least a little stiff the first time a camera points their way on their wedding day. It’s completely normal. But knowing how to pose naturally for wedding photos is the difference between images that feel like a genuine memory and ones that look like a school portrait with better flowers. The good news is that looking relaxed in photos has very little to do with being photogenic. It’s mostly about mindset, preparation, and knowing a few practical tricks that your photographer will thank you for.

Key Takeaways

Point Details
Focus on connection Looking natural comes from genuine interaction with your partner instead of posing for the camera.
Prepare beforehand Practising relaxed poses and staying rested helps reduce stress and improve photo quality.
Use movement and props Walking together and keeping your hands busy makes photos feel less forced and more candid.
Manage your posture Small adjustments like lowering shoulders and uncrossing arms improve how confident you appear.
Choose the right photographer Trust and comfort with your photographer help you relax and be yourself for authentic photos.

How natural posing makes your wedding photos come alive

To pose naturally, first grasp why your body language and comfort matter so much in creating authentic wedding photos.

Your body communicates before you say a word. When you’re tense, it shows. Crossed arms, hunched shoulders, a rigid jaw — these small signals read loud and clear in a photograph. Research on body language and confidence confirms that observers read dominance and ease from posture, and small adjustments genuinely change how natural you appear on camera. The fix is often simpler than people expect.

Here are the posture basics that make an immediate difference:

  • Drop your shoulders away from your ears before every shot
  • Uncross your arms and legs to open up your body language
  • Soften your knees rather than locking them straight
  • Turn slightly sideways instead of facing the camera square-on
  • Tilt your chin forward and slightly down to avoid the unflattering “looking up” angle

The other major shift is where you direct your attention. When you focus on your partner instead of the lens, your face and body follow naturally. The benefits of natural wedding photography are clearest in images where couples appear genuinely absorbed in each other rather than self-consciously waiting for the shutter.

Prepare yourself for natural wedding photos

Once you understand the importance of body language, the next step is to prepare physically and mentally so that looking natural becomes easier on the day itself.

Preparation reduces stress and directly improves photo quality. Couples who practise relaxed poses beforehand and arrive rested consistently produce more natural images. It sounds obvious, but very few people actually do it.

Try these preparation steps before your wedding day:

  • Practise in front of a mirror or phone camera to find angles and expressions that feel genuine to you
  • Wear your shoes around the house for a few days before the wedding so you’re not distracted by discomfort during photos
  • Sleep well and stay hydrated in the 48 hours leading up to the day — tired eyes and dry skin show up in every shot
  • Brief your photographer on your personalities, what makes you laugh, and any poses you love or hate
  • Keep getting-ready spaces tidy and well-lit to set a calm, positive tone that carries into your photos

Pro Tip: Do a short phone video call with your photographer a week before the wedding. Even 20 minutes of chatting builds the kind of rapport that makes you forget there’s a camera on the day.

Preparation action Why it helps
Practise relaxed poses beforehand Reduces self-consciousness on the day
Choose comfortable attire Allows free movement and better body language
Stay hydrated and rested Freshens skin, eyes, and overall energy
Brief your photographer on your style Avoids surprises and unwanted formal poses
Keep the getting-ready space calm Sets a relaxed emotional tone for the whole day

Use the wedding photography checklist to make sure you’ve covered every preparation detail before the big day arrives.

Execute natural poses that focus on your connection

Having prepared mentally and physically, now it’s time to apply those techniques and create natural, heartfelt photos by focusing on your connection and letting movement do the work.

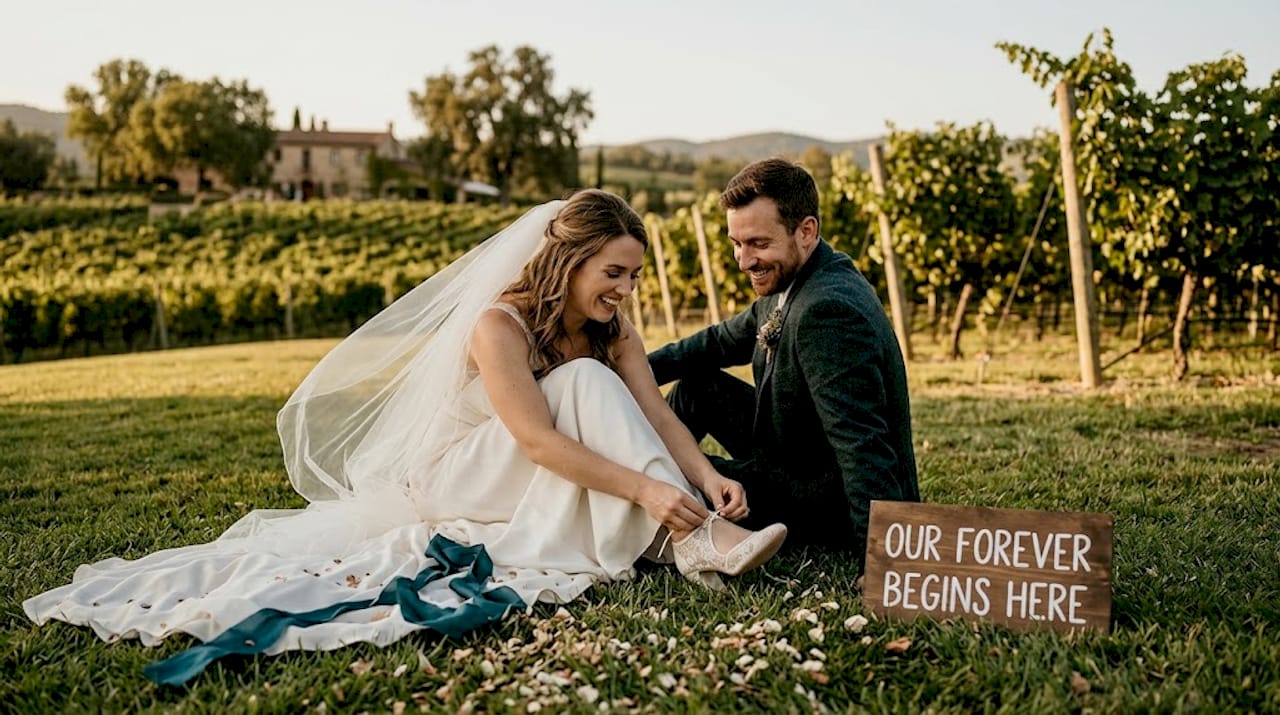
Wedding couple candid sitting together smiling

The biggest mistake couples make is standing perfectly still and waiting. Stillness invites stiffness. Movement like walking together diffuses self-consciousness, props keep hands busy and break stiffness, and focusing on each other rather than the camera produces the moments that feel genuinely real.

Here’s a simple step-by-step approach to follow during your portrait session:

  1. Start with a slow walk. Hold hands and stroll together without any specific destination. Let your photographer capture you mid-stride.
  2. Whisper something in each other’s ear. It doesn’t matter what you say. The reaction is always genuine and always photograph beautifully.
  3. Use your props. Hold your bouquet naturally, adjust his tie, clink your champagne glasses. These small actions relax your hands and create visual interest.
  4. Make eye contact with each other, not the lens. Look at your partner’s eyes and notice something specific. This small act of attention shows in your expression.
  5. Let your photographer direct you into adjustments rather than trying to hold a rigid pose. Think of it as a gentle guide rather than a set of instructions.

Pro Tip: If you feel your shoulders creep up or your jaw tighten, signal your partner to squeeze your hand. A squeeze breaks the tension and usually produces a genuine smile or laugh.

Comparison: Static poses versus interactive poses

Pose type How it feels How it photographs
Standing still, facing camera Awkward, self-conscious Stiff, formal, disconnected
Walking hand-in-hand Natural, purposeful Relaxed, dynamic, candid
Looking at each other Intimate, present Warm, genuine, emotionally rich
Using a prop together Playful, engaged Natural hands, authentic expressions

If you’d like more guidance on planning candid wedding portraits, or want to understand what a relaxed wedding photography session actually looks like in practice, both resources are worth your time.

Make the most of your timeline and photographer relationship

Besides posing mindset, your wedding day schedule and your relationship with your photographer play a huge role in how natural your photos turn out.

Building breathing room into your timeline avoids the kind of rushing tension that appears visibly in photos. Choosing a photographer you genuinely trust also helps you stop performing and simply be yourself. These two things matter more than most couples realise when they’re deep in venue and florist decisions.

Timeline planning tips:

  1. Schedule at least 90 minutes for couple portraits rather than squeezing everything into 30.
  2. Build transition buffers between ceremony, cocktail hour, and reception so you’re not racing between locations.
  3. Plan a 10-minute break just for the two of you, away from guests, to breathe and reconnect before portraits.
  4. Ask your photographer to play music during the session to shift the mood and ease nerves.
  5. Avoid scheduling portraits in the hottest part of the day. Golden hour in Adelaide typically runs from 5:30pm to 7pm depending on the season.

Questions to ask your photographer about rapport and style:

  • “How do you help couples who feel nervous in front of the camera?”
  • “Do you guide poses or prefer to let things unfold naturally?”
  • “Can we see examples of photos from couples with a similar personality to ours?”
  • “How do you handle it if we’re not feeling comfortable during a session?”

The personalised photography experience you get from the right photographer makes all of this far less daunting.

Why natural posing is more about feeling than technique

Here’s something worth sitting with. Most posing guides focus on technique: chin angle, hand placement, which foot to shift weight onto. And yes, those things genuinely help. But in our experience shooting weddings across Adelaide, the couples who appear most natural in their photos aren’t the ones who studied every posing formula. They’re the ones who stopped thinking about the camera altogether.

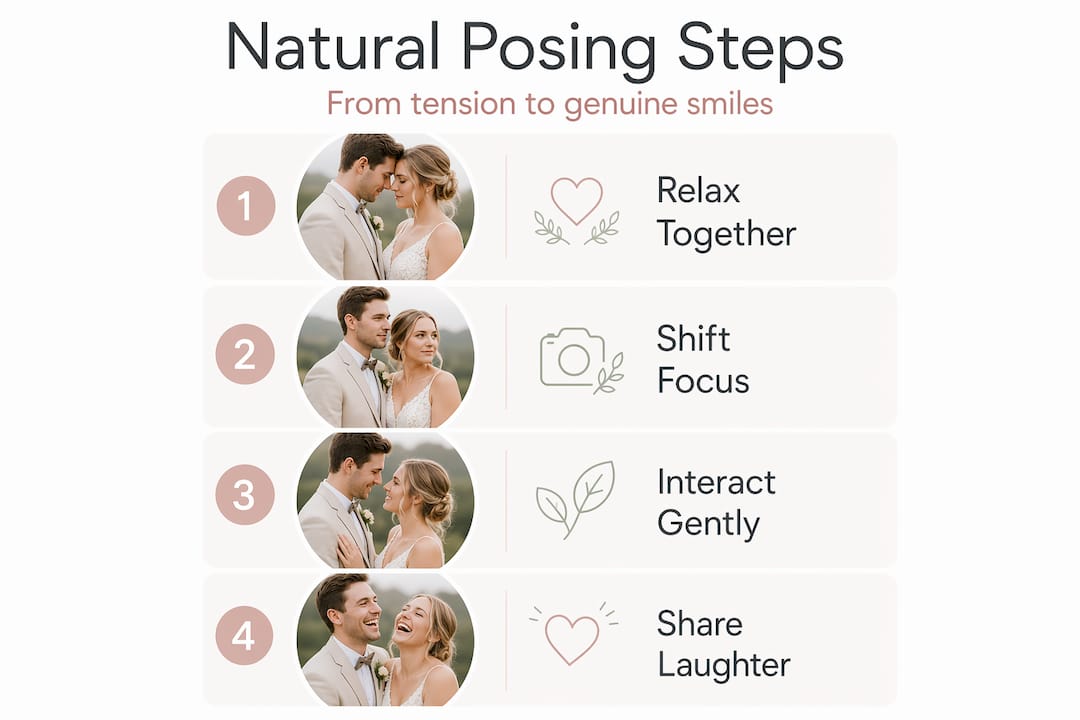
Four-step infographic on posing naturally for wedding photos

The best photos happen when couples stop worrying about how to hold themselves and simply exist together. The technique gives you a foundation, but it’s the emotional connection that carries the image.

What this means practically is that a shared laugh mid-pose will always outperform a technically perfect stance. A deep breath between shots resets your body language more effectively than any positioning tip. And genuine curiosity about your partner, noticing the small things about them on the day, produces the kind of expression no pose can manufacture.

Pro Tip: Before each set of portraits, take 30 seconds to stand close to your partner without speaking. Just breathe and look at each other. What you feel in that moment is exactly what you want your photos to capture.

Authenticity isn’t a technique. It’s a state of presence. The natural wedding portraits guide at SvenStudios explores this idea further if you’d like to read more.

Capture your genuine love story with SvenStudios

Ready to put all of this into practice? At SvenStudios, Steven and Luisa specialise in authentic wedding photography that prioritises your real moments over staged formality. As an Adelaide husband-and-wife team, they understand exactly how to put couples at ease, guide you gently through portraits, and capture the candid, joyful images you’ll want to look at for decades. Explore the personalised wedding photography options tailored to your unique story, or download the wedding photography checklist to make sure you’re fully prepared before the day. Your love story deserves to be told honestly and beautifully.

Frequently asked questions

How can we look natural if we’re shy in front of the camera?

Focus on each other rather than the camera by chatting, whispering, or laughing together. Shifting your attention to your partner takes the pressure off performing and creates genuinely candid moments.

What should we do with our hands during photos?

Give your hands something purposeful to hold or do — your bouquet, a champagne glass, or fixing a cufflink all work well. Using props breaks the static feeling and allows your body and face to relax naturally.

Is it better to look at the camera or each other?

Looking at each other almost always produces warmer, more genuine images than staring down the lens. Eye contact between partners creates an intimacy that the camera picks up immediately.

How can small posture changes help us look more confident?

Simple fixes like straightening your spine, dropping your shoulders, and uncrossing your arms shift how relaxed and confident you appear in photos. Small deliberate posture changes genuinely alter how others perceive your composure, even before you feel it internally.

Recommended

  • Why Natural Wedding Photography Captures Real Memories
  • Authentic Wedding Photography For Your True Love Story
  • Relaxed Wedding Photography For Authentic, Joyful Memories
  • Your Ultimate Wedding Photography Checklist For Authentic Moments
May 18, 2026/by Steven Duncan
Interesting

The true role of a photographer in Adelaide proposals

Most people assume proposal photography is simply about capturing the moment the ring appears. Get that shot, and the job is done. But if you’ve ever watched the raw footage of a proposal, you’ll know the real gold comes a few seconds later, when the shock settles into joy, when tears arrive before words do, and when two people hold each other like the world has paused. That is the moment most photographers miss. And that is precisely why understanding what a skilled proposal photographer actually does matters so much.

Key Takeaways

Point Details
Capture moments after the ring The most emotional proposal reactions happen after the ring is on, so don’t rush to put away the camera.
Documentary style is favoured Natural, unobtrusive photography is preferred for proposals to preserve authenticity.
Plan clear cues with your photographer Communicating signals and timing ensures your photographer doesn’t miss the critical instant.
Consider privacy preferences Couples should weigh whether photography matches their values and desire for intimacy.
Storytelling matters most Great proposal photography is about emotional storytelling, not just proof of the event.

What makes proposal photography unique?

Photographing a wedding has a schedule. A proposal has none. That unpredictability is what makes it one of the most technically and emotionally demanding types of photography there is.

A skilled photographer must read body language, anticipate the exact second a person drops to one knee, and stay invisible while doing it. Any hesitation, any equipment fumble, and the real moment is gone. That is why preparation is everything.

From a technical standpoint, professionals arrive with cameras already configured: burst mode active, sufficient storage checked, exposure pre-set for the lighting conditions at that specific location. As noted in how to capture a proposal, edge-case handling includes continuing coverage after the ring goes on the finger and preparing for the immediate emotional aftermath, as well as managing technical realities like burst shooting and storage reliability.

Here is what a thorough proposal photographer brings to the job:

  • Pre-scouting the location to understand angles, light, and crowd movement
  • Arriving early to blend in and avoid drawing attention
  • Using a telephoto lens to shoot from a comfortable distance without intruding
  • Shooting in burst mode to ensure no micro-expression is lost
  • Staying active after the ring is placed, capturing laughter, happy tears, and embraces

“The most meaningful images from a proposal are rarely the ring shot itself. They are the three seconds after, when neither person has said a word yet.”

That is the philosophy behind documentary style wedding photography, and it applies just as powerfully to proposals.

Capturing authentic and candid moments

Natural reactions are what couples look back on most fondly. Not the staged photos, not the perfect lighting, but the real, unguarded expressions of love. That is exactly why authenticity should guide every decision you make when planning proposal photography.

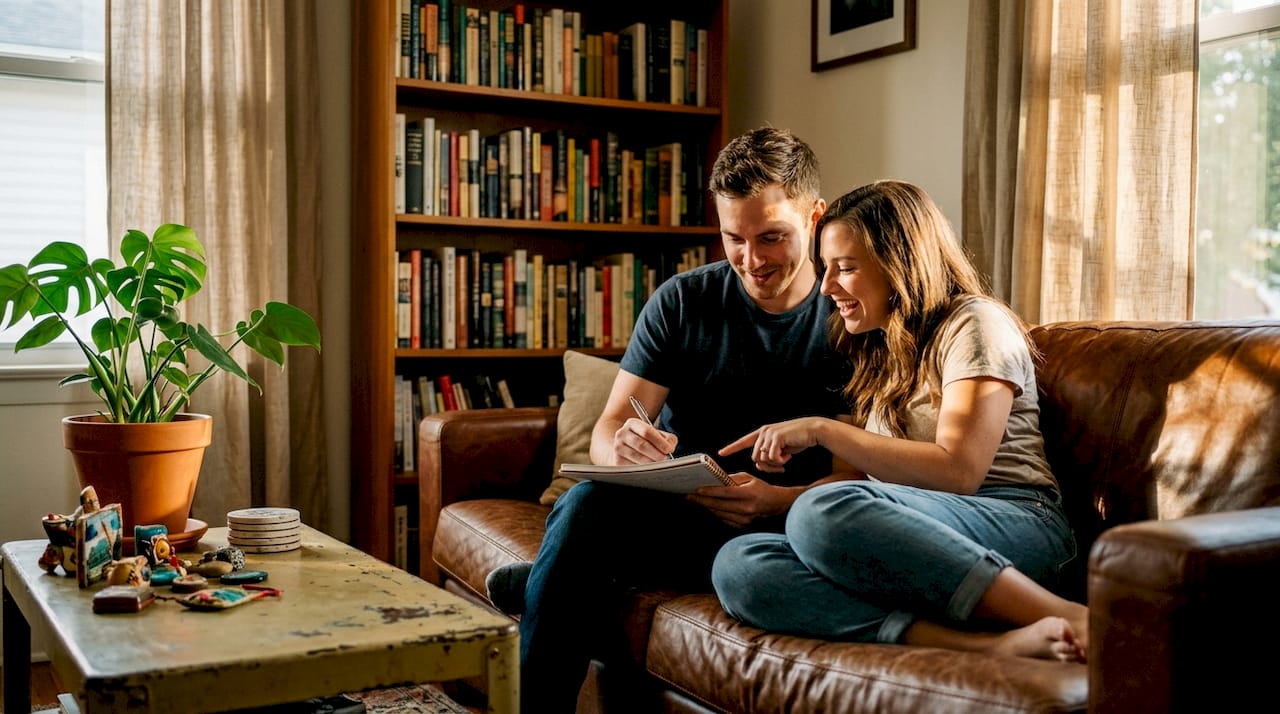
Couple’s candid joyful reaction after proposal

Wedding photography trends for 2026 show a clear shift toward natural and documentary styles over posed photography, and this benchmark applies directly to proposals. Couples want real reactions and minimal disruption, not a photographer stepping out from behind a bush at the wrong moment.

Here is a step-by-step approach that helps keep the moment genuine:

  1. Choose a location that feels natural to your relationship, not just scenic for photos
  2. Brief your photographer thoroughly before the day, including timing and a discreet signal
  3. Ask your photographer to arrive early and settle into the environment
  4. Avoid rehearsed poses immediately before or during the proposal
  5. Allow the photographer space after the moment; don’t look for the camera

Blending into public spaces around Adelaide requires real skill. Whether you’re at Glenelg Beach, the Adelaide Botanic Garden, or a private rooftop, your photographer needs to look like just another person enjoying the day. Understanding that workflow is something we cover in our engagement photo session workflow guide.

Pro Tip: Have a quick chat with your photographer the week before. Confirm the exact spot you’ll be standing, roughly what time, and a small hand signal you can use to indicate the proposal is about to happen. This tiny detail can mean the difference between a perfectly timed shot and a missed reaction.

For more practical approaches on achieving natural results, our candid photography tips are worth reading before you book anyone.

Comparing photographer styles for your Adelaide proposal

Once you understand the value of authenticity, the next decision is choosing the photography style that fits how you want this memory to feel. Not all photographers work the same way, and the difference matters.

Style Approach Best for
Documentary Observational, unobtrusive, story-driven Couples who want genuine, unposed memories
Traditional/posed Directed, structured, controlled Couples who prefer polished, formal imagery
Hybrid Mix of candid coverage and select posed portraits Couples who want both real moments and curated shots

Infographic comparing documentary and traditional styles

2026 wedding photography trends clearly show documentary style leading in popularity, particularly for emotionally significant events like proposals where authentic reactions matter most. Many couples report that their most treasured images are the ones they didn’t know were being taken.

For most Adelaide proposals, a documentary or hybrid approach works best. If you’re unsure which style fits your personality and vision, our guide on finding your perfect photography style walks you through the key questions to ask yourself. You can also browse our couples photography portfolio to get a feel for how different approaches look in real settings.

Choosing the right proposal photographer: What most couples miss

Many couples focus on portfolio aesthetics when hiring a photographer. That’s important, of course. But what often gets overlooked is the briefing process, and this is where proposals succeed or fall apart.

Research on proposal photography confirms that couples should communicate concrete cues including the exact spot and time, what the partner will be wearing, and a small signal, because the reaction can occur in under a second and the photographer must already be ready to shoot.

Here is a practical planning table to guide your preparation:

Planning cue Why it matters
Exact location and position Allows photographer to pre-position without guessing
Time of proposal Determines lighting conditions and crowd levels
Partner’s outfit colour Helps photographer identify them from a distance
Signal from the proposer Gives photographer two to three seconds of advance notice
Post-proposal coverage preference Ensures the emotional aftermath is captured

Before you book anyone, consider asking these questions during your first conversation:

  • How do you stay discreet in public locations?
  • What is your approach once the ring is placed?
  • Can I see examples of your post-proposal coverage?
  • How do you handle low light or changing weather?
  • What backup equipment do you carry?

Our Adelaide engagement photographer page goes into more detail about how we approach these conversations. You can also download our wedding photography checklist to make sure no planning detail is forgotten.

Pro Tip: Don’t leave the briefing until the day before. Give your photographer at least a week to plan, scout the location if needed, and confirm all the logistics.

Respecting privacy and personal values: Is photography always right?

Here is something worth sitting with. Not every couple wants a photographer present during their proposal, and that is completely valid.

Real conversations from couples reveal that for some people, privacy and the raw sensory memory of being present outweigh having images. Firsthand accounts can feel more meaningful than photographs, and not every partner wants that moment documented.

Consider these pros and cons honestly:

  • Pros: Lasting visual memory, shareable with family, reliving genuine emotion years later
  • Cons: Some partners feel their private moment was staged or observed; the presence of a photographer can subtly alter behaviour
  • Pros: Professional coverage frees you to be fully present without worrying about phone cameras
  • Cons: If your partner values spontaneity and privacy, discovering a hidden photographer might feel intrusive

If you are considering your options, our piece on the benefits of an engagement shoot offers a thoughtful perspective on how photography can enhance rather than overshadow intimate moments.

“The question isn’t whether you should have photos. It’s whether your partner would want them, and whether the presence of a camera changes the moment you’re trying to create.”

Our perspective: Proposal photography is about emotional storytelling, not just evidence

As photographers who have worked across many Adelaide proposals and weddings, we have noticed a tendency in couples to think about photography as proof. Proof that it happened. Proof of the ring, the location, the moment. That mindset, while understandable, often leads to decisions that prioritise the photo over the experience.

The images we treasure most, from years of doing this work, are never the technically perfect ones. They’re the ones where someone laughs through tears, or where two people forget entirely that a camera exists. That is authentic wedding photography in its truest sense.

Our genuine belief is that a photographer should enhance the emotional reality of a proposal, not interrupt it. If the presence of a camera changes how either person behaves, something needs to be reconsidered. The goal is always to serve the couple’s story, not the photograph itself.

Connect with photographers who capture your real story

If you want your Adelaide proposal captured with genuine care and an eye for the moments that matter most, we’d love to help. At SvenStudios, Steven and Luisa bring a documentary-focused, story-first approach to every session. You can explore our thinking on authentic wedding photography, browse the full engagement photography portfolio, and get organised with our wedding photography checklist before reaching out. Every couple’s story is different, and we believe your proposal photography should feel like yours alone.

Frequently asked questions

How can we keep our Adelaide proposal photography secret from my partner?

Share concrete cues like the exact location, timing, and your partner’s outfit with your photographer in advance, along with a small agreed signal, because the reaction happens in under a second and the photographer must already be ready.

What is the most important moment for a photographer to capture during a proposal?

The emotional aftermath right after the ring goes on is often the most meaningful, as post-proposal reactions including tears, laughter, and embraces carry far more emotional weight than the ring shot itself.

Are posed photos required during an Adelaide proposal shoot?

No. Most couples today prefer a documentary approach focused on real reactions, and 2026 photography trends confirm that natural and unposed styles are strongly favoured for emotionally driven moments like proposals.

Do all couples need a photographer for their proposal?

Not necessarily. Some couples find that privacy and personal memory feel more meaningful than having images, so the decision should be guided by both partners’ values and comfort levels.

Recommended

  • Adelaide Engagement Photographer | SvenStudios
  • Wedding Videographer Roles Explained For Your Adelaide Film
  • Adelaide Wedding Photographer | SvenStudios Photography
  • Fun & Creative Adelaide Wedding Photography & Videography
May 14, 2026/by Steven Duncan
Page 6 of 38«‹45678›»

Blog

All
News
Wedding Ideas

Latest

  • Overhead photo of negotiation documents and camera gear on table
    How to negotiate wedding photography pricing in 2026
  • Virtual Audio Guest Book and Digital Guest Book for Weddings
    Virtual Audio Guest Book and Digital Guest Book for Weddings
  • 50 Creative Ways To Use QR Codes At Your Wedding
    50 Creative Ways to Use QR Codes at Your Wedding | Happlee
  • QR code audio guest book sign and phone for weddings and events.
    QR Code Audio Guest Book – The Modern Alternative to the Vintage Phone
  • Why a Printable Scavenger Hunt QR Code Is Becoming Obsolete
    Why a Printable Scavenger Hunt QR Code Is Becoming Obsolete

ADELAIDE PHOTOGRAPHY SERVICES

  • Wedding Photography
  • Wedding Videography
  • Newborn Photography
  • Family Photography
  • Engagement Photography

ONLINE SHOP

    • Bridal Bouquet Charms
    • Hand Made Wedding Items
    • Super 8 Film to Digital
    • VHS to Digital
    • Photobooth Hire
    • Live Stream Service
    • Audio Guest Book Hire
    • Happlee QR
    • SelfBooth


QUICK LINKS

  • Home
  • About Svenstudios
  • Testimonials
  • Portfolio
  • Contact
  • Sitemap

FREE SERVICES

  • SeatScan – QR Seating Chart
  • SICC – IG Carousel Composer
  • Slideshow Reel Creator

  • ABIA

  • Best in Adelaide

AROUND AUSTRALIA & NZ

  • Adelaide
  • Darwin
  • Hobart
  • Canberra
  • Perth
  • Queenstown, NZ
  • International

PHOTO & VIDEO PACKAGES

  • Adelaide Packages
  • Australia-Wide Packages
  • New Zealand-Wide Packages

RESOURCES

  • Adelaide Wedding Venues
  • Darwin Wedding Venues

GET IN TOUCH


  • 40 Horseshoe Dr, Aberfoyle Park SA 5159


  • 0401 403 080


  • sven@svenstudios.com

OFFICE HOURS:

  • Monday-Friday 09:00 – 17:00
  • ABN – 81371854076

CONNECT WITH US


Facebook


Instagram


Pinterest


YouTube


TikTok

© Copyright - SvenStudios - Enfold WordPress Theme by Kriesi
  • Link to Facebook
  • Link to Instagram
  • Link to Youtube
  • Link to Pinterest
  • Link to TikTok
  • Link to Mail
Scroll to top Scroll to top Scroll to top